Can You Use an Air Conditioner Without a Window? (How To Vent 4 Other Ways!)
Are you struggling with how to install your AC unit without a window? Wondering if there is another way to vent it?
Can you use an air conditioner without putting it in the window at all?
You can use a window AC unit without a window by venting the exhaust somewhere else. You can vent a window AC unit through an exterior wall, through a door, up through a chimney, or into the attic with some effort.
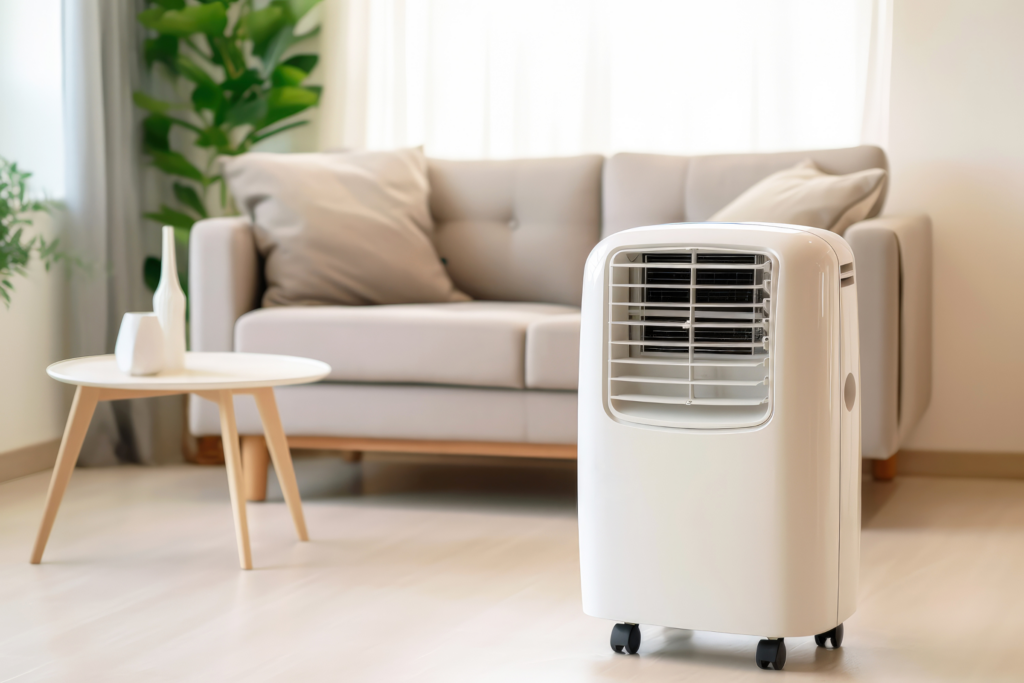
If you aren’t able to make modifications to your walls or other structures, you should consider a portable AC unit instead. Based on my personal experience, a portable AC unit will be easier to use and work more efficiently than trying to find an alternate way to vent a window AC unit.
Portable air conditioners are an excellent alternative for those who don’t have window access or wish to avoid the hassle of a window installation. These appliances come with various cooling capacities and user-friendly features, making them a practical choice for many households.
Read on to learn more about the nitty gritty details of each option, the reason why you need to pay attention to the exhaust from a window AC unit, and the potential issues that you will face if you don’t install a window AC unit in the recommended way.
4 alternative ways to vent a window air conditioner outside
Yes, you can use window air conditioners without a window. Although it’s not as common, there are alternative methods to install your window AC unit.
Here are a few practical options:
- Venting through a wall
- Venting up through a chimney
- Venting into the attic
- Venting through an exterior door
Keep in mind that none of these solutions (except maybe the wall option) would be considered a permanent way to install your window AC unit but they could all be used in a pinch if you don’t have any other options.
In general, it would be best to consider replacing your window AC unit with a portable AC unit that is meant to be used indoors and has additional options for venting.
Remember, regardless of the method you choose, safety and maintaining the efficiency of your air conditioner are crucial. It’s essential to follow the manufacturer’s guidelines and consult a professional if you’re unsure about any of the installation steps with this appliance.
Below is a table that summarizes the key points from the article for easier reference:
| Venting Method | Key Considerations | Longevity | Challenges & Risks | Skill Level Required |
|---|---|---|---|---|
| Venting through a wall | Close to electrical outlet, non-obstructive | Long-term | Requires professional installation, may violate building codes, drainage & moisture concerns | High |
| Venting up through a chimney | Chimney should not be in use for other purposes, near an electrical outlet | Temporary | Could result in inefficiencies, hazards like carbon monoxide build-up, and may violate codes or void warranty | Medium |
| Venting into the attic | Adequate attic ventilation, run hose to attic without obstructions | Not Advisable | May lead to moisture, mold, structural damage, potentially violates building codes, efficiency may be compromised | Medium |
| Venting through an exterior door | Close to an electrical outlet, easy access for maintenance | Temporary | Must keep door closed for efficiency, sealing challenges, condensation drainage required | Medium |
Each venting method has its own set of challenges and considerations. It’s important to follow safety guidelines and consult professionals when uncertain about installation steps.
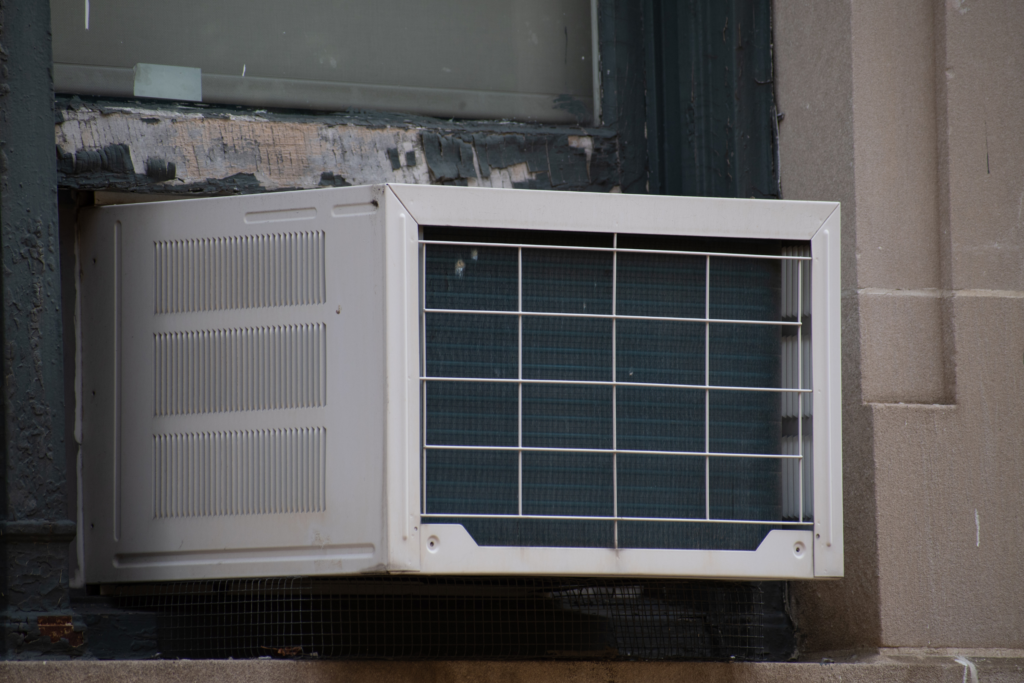
How to vent your window AC unit through a wall
Installing a window AC unit in a room without a window by venting it through a wall is possible but comes with several challenges.
Venting a window AC through a wall is complex and may require professional installation services, potentially violating building codes and voiding the unit’s warranty. Drainage and moisture control are also concerns, and the alteration may compromise the wall’s structural integrity and insulation. The cost can be higher than other cooling options designed for rooms without windows. Electrical placement and outdoor space limitations should also be considered.
If you have the skills necessary to do this, installing a window AC unit in the wall is actually a pretty viable option, even in the long term. However, the job will require a pretty significant amount of project design, skill, and effort for quality results.
Here is a step-by-step guide on how to do so:
- Choose a suitable location: Pick a spot in your room where you want to install the air conditioner, keeping in mind that it should be close to an electrical outlet and not obstruct any doorway or window.
- Measure and mark the wall: Measure your window AC unit’s dimensions and mark the outline on the wall where you want to install it. Don’t forget to leave some space around the outline for proper insulation.
- Cut the hole: Use a saw to carefully cut the marked outline on the wall. Make sure to wear proper safety gear like gloves and goggles while cutting, especially if dealing with concrete.
- Install a support frame: Build a wooden frame that fits the hole snugly and secure it to the studs in the wall using screws.
- Insert the air conditioner: Carefully place the window AC unit into the hole and secure the parts to the support frame with appropriate brackets and screws.
- Seal the gap: Insulate the gap between the wall and the air conditioner using caulk and foam weatherstripping to prevent drafts and energy loss.
- Attach the ventilation duct: Connect a ventilation duct to the exhaust of the air conditioner and route it to the other side of the wall or the outside. Secure the duct with clamps and seal any joints using duct tape.
- Install an exterior vent cover: To protect your duct from weather and debris, install a vent cover product on the other side of the wall where the duct exhausts the hot air.
Remember to follow the manufacturer’s instructions and safety guidelines while installing the air conditioner.
How to vent your window AC unit up a chimney
Venting a window AC unit up a chimney is generally not recommended, but it could be possible in a pinch.
Chimneys are designed for a specific purpose—venting hot gases from a fireplace or furnace—and modifying this system for an air conditioner could result in inefficiencies or even hazards like carbon monoxide build-up if the chimney is also being used for its original purpose.
Additionally, you could face issues with moisture control and potentially violate local building codes or void the AC unit’s warranty.
How to vent your window AC up a chimney: step-by-step:
- Inspect the chimney: Check for any obstructions, debris, or buildup. If the chimney is not in good condition or is being used by other appliances, such as a water heater or furnace, do not proceed.
- Measure and prepare: Measure the diameter of the exhaust hose on your window AC unit and purchase a flexible vent hose of the same size. Also, gather tools and materials such as wire, a ladder, and gloves for safe installation.
- Install the chimney vent connector: Attach the flexible vent hose to the exhaust port on your window AC unit. Secure it tightly with the provided clamp or zip tie.
- Position the AC unit: Place the window AC unit on a stable surface near the chimney. Make sure it’s level and secure. If necessary, use a support bracket to hold the weight of the unit.
- Route the vent hose up the chimney: Carefully feed the vent hose up the chimney until it reaches the flue vent. Attach the vent hose to the flue vent using a piece of wire to ensure the warm air from the AC unit can be easily exhausted up the chimney.
- Secure the vent hose: Double-check the vent hose connections and make sure they are secure. Ensure the hose isn’t kinked or obstructed, which could impede airflow.
- Turn on the AC: Plug your window AC unit into an outlet and test its functionality. It should be able to efficiently cool the room while the warm air is vented up the chimney.
Keep in mind that this setup is more suitable for those who do not intend to use the chimney for its original purpose, as utilizing both the fireplace and AC vent at the same time could cause issues.
How to vent your window AC unit into the attic
Venting a window AC unit into an attic is not advisable for several reasons.
First, the hot air expelled by the AC unit will accumulate in the attic area, potentially leading to issues with moisture, mold, and even structural roof damage that require repairs. Second, this method of venting could violate local building codes and void your AC unit’s warranty.
Finally, because attics are typically not well-ventilated areas, the efficiency of the air conditioner will likely be compromised, making it a less effective and potentially more costly cooling solution.
To effectively vent your window air conditioning (AC) unit into an attic, follow the outlined steps below:
- Measure the ventilation space: Ensure that there is adequate ventilation in the attic to handle the hot air expelled by the AC unit. Insufficient ventilation can result in poor performance, so make sure your attic is large enough to accommodate the hot air.
- Determine the hose route: Plan a route to run the exhaust hose from your AC unit to the attic, ensuring that there are no obstructions or sharp bends.
- Install a duct or vent: There may be existing vents in your attic that can be reused to help facilitate airflow. If not, you may need to install a new vent or duct, making sure it is properly sealed and insulated to prevent air leakage and heat transfer.
- Secure the exhaust hose: Run the exhaust hose from the AC unit to the vent or duct in the attic. You’ll want to make sure it’s properly secured, keeping in mind any bends or turns in your hose route.
- Monitor attic temperature: After installation, it’s crucial to monitor the temperature in your attic on hot days. Extremely high temperatures can negatively impact the performance of your AC unit and potentially lead to damage. If needed, consider adding additional ventilation or insulation.
By venting your window AC unit into the attic, you can effectively use it without placing it directly in a window. Just ensure that the necessary steps are taken to establish proper ventilation for optimal performance.
How to vent your window AC unit through an exterior door
Venting a window AC unit through an exterior door or a doggy door is technically possible but comes with some challenges.
The door will need to remain closed to keep the unit operating efficiently, which could be inconvenient. Additionally, there may be issues with sealing the exhaust properly, leading to inefficiency and potential loss of cool air. You’ll also need to ensure proper drainage for any condensation created by the unit.
Step-by-step instructions:
- Find the right location: Choose an exterior door that is near a power outlet and can be easily accessed for installation and maintenance. Avoid using front doors that could create safety concerns or inconvenience for household members and guests.
- Measure the door: Measure the width and height of the chosen door to ensure your window AC unit will fit properly. Be sure to account for any door molding or trim when making these measurements.
- Purchase necessary materials: You’ll need a venting kit, insulation materials, and additional tools for this project. Venting kits are available online or at local hardware stores and should include a hose, vent, and attachments. Make sure the kit is compatible with the size of your AC unit and door measurements.
- Create an opening: Follow the venting kit instructions to properly cut an opening in your door. This may require the use of power tools and assistance from another person for safety and precision. Always wear protective gear when using power tools.
- Install the vent: Secure the vent according to the kit instructions, then connect the hose to the window AC unit. Ensure the connection is tight and secure to prevent air leakage.
- Insulate the opening: Properly insulate the opening around the vent to prevent drafts and improve energy efficiency. Insulation materials may include weatherstripping, foam, or caulking, depending on the door type and specific project needs.
- Secure the AC unit: If necessary, find a method to secure your window AC unit near the door to prevent it from tipping or shifting. Some creative solutions might include using a small table, shelf, or custom-built support structure.
By following these steps, you can effectively vent your window AC unit through an exterior door without having to install it in a window. Remember to periodically check and maintain your vent setup to ensure optimal performance and energy efficiency.
Why do you have to vent a window AC outside?
Air conditioners, especially window AC units, need proper venting to function efficiently. This is because one of their main functions is the process of removing warm air from your room and expelling it outside.
Here are a few reasons why venting a window AC outside is crucial:
- Heat removal: Air conditioners work by absorbing the heat from the room’s air and transferring it outside. An exhaust hose helps to accomplish this task efficiently. If you don’t vent your window AC unit outside, the warm air cannot be expelled, and the temperature in the room will not decrease.
- Proper airflow: Ventilation is essential for the efficient operation of the AC unit. The window AC unit needs a constant supply of fresh air to work effectively. By venting the exhaust hose outside, you ensure proper airflow for the unit.
- Condensation control: As the air conditioner cools your room, it also removes moisture from the air. This moisture is usually expelled out of the unit through the exhaust hose. Without proper ventilation, the condensed water can accumulate, leading to higher humidity mold, mildew, and other moisture-related problems.
- Energy efficiency: If your window AC unit is not properly vented outside, it will struggle to cool your room and maintain the desired temperature in the area. This extra effort often results in higher house energy consumption and increased utility bills.
To ensure the optimal performance of your window AC unit, it’s essential to have a proper ventilation system in place. Venting your window AC outside with an exhaust hose enables efficient heat removal, adequate air flow, efficient condensation control, and maintains energy efficiency.
Potential Problems with Venting a Window AC through Alternative Means
When attempting to use a window air conditioner without an actual window, you might face some challenges in creating an alternative venting system.
Here are some potential problems that could arise during this process.
- Misdirected airflow
- Insufficient ventilation
- Hose positioning and stability
- Safety concerns
While it is possible to use a window air conditioner without a window by creating an alternative venting system, it’s essential to consider these potential issues.
Would portable air conditioners or a windowless air conditioner make more sense?
In most cases, it would make more sense to use a portable air conditioner rather than trying to adapt a window AC unit for a room without a window.
Portable AC units are designed for more flexible placement and typically come with kits that allow you to vent the exhaust through a smaller hole in a wall or even a door. They are generally easier to install and remove, making them more versatile for different living situations.
Using a portable AC avoids many of the challenges and potential code violations associated with modifying a window unit, such as compromised efficiency, moisture control issues, and voiding the warranty.
Here are some interesting statistics about portable air conditioners:
- Portable air conditioners are becoming increasingly popular, with sales increasing by over 20% in the last year.
- Portable air conditioners are typically more energy efficient than window units, using up to 25% less energy.
- The average portable air conditioner can cool a room of up to 400 square feet.
- Portable air conditioners are typically quieter than window units, with some models producing as little as 50 decibels of noise.
Overall, a portable air conditioner is usually a more practical and less complicated solution for cooling a room without a window.
Let Us Know How We’re Doing!
Did this expertly prepared resource answer your question?
Do you have another question about home maintenance, home improvement projects, home appliance repair, or something else?
Get more information, send in questions and keep the discussion going by contacting the I’ll Just Fix It Myself company customer service team at at 1-800-928-1490 or Email us at [email protected]