How to Clear Schedule on a Honeywell Thermostat [Step-by-Step Guide by Model]
Your thermostat is likely one of the most important pieces of equipment in your house that you don’t even think about, so what happens if it stops working properly? One of the first steps to troubleshooting your Honeywell thermostat is to clear the schedule, but where do you start?
How do you clear the schedule on a Honeywell thermostat?
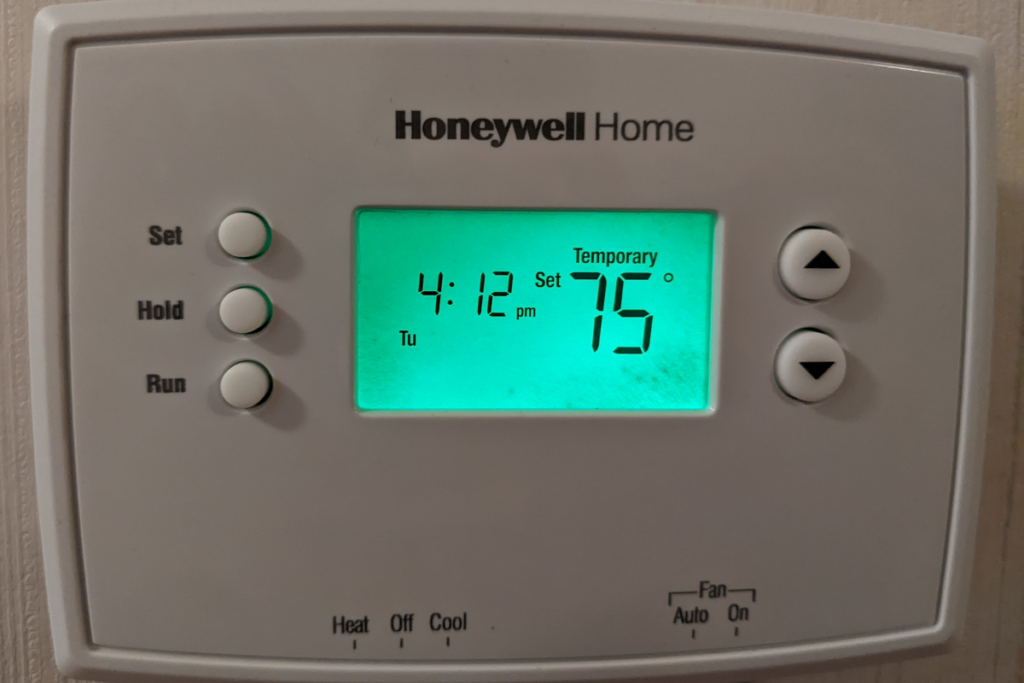
Most Honeywell thermostats can be cleared by pressing the HOLD button for several seconds. WiFi-enabled and Smart thermostats require a series of steps to make a permanent change to the program. Temporary changes can typically be made simply by pressing the temperature change buttons. Consult to manufacturer’s instructions for details.
Keep reading to learn more about when and why you should clear the schedule on your thermostat or a factory reset. I’ve also included a detailed set of instructions for
Clearing the schedule on a Honeywell thermostat
Having a programmable thermostat offers you the ability to set the desired temperature based on the day or time, although the number of options you have will vary by the thermostat model.
Having a programmable thermostat can improve the energy efficiency of your home as it allows you to adjust the temperature so your HVAC unit isn’t working as hard when you’re not at home. You’re also able to reprogram it based on the season without having to adjust the thermostat throughout the day. However, it is sometimes necessary to clear the schedule to restore your thermostat to its peak working conditions.
You may want to reset the schedule on a Honeywell thermostat for a variety of reasons including:
- To change the programmed temperatures in your home
- To purge the schedule memory
- To recalibrate the temperature sensor
The best way to know how to clear the schedule – or perform any other basic functions of your thermostat – is to consult the original manufacturer’s directions. However, most people have probably lost those, if they ever had them at all.
Most Honeywell thermostats can be cleared by holding the HOLD button for several seconds. Once cleared, the thermostat will prompt you to begin programming the new temperature schedule.
If that doesn’t work, you make want to consider the handy guide I’ve included below. If all else fails, a factory reset will do the trick, although you will lose any additional information.
Read this article to find out what to do if your Honeywell thermostat isn’t working after a battery change!
Clearing a thermostat schedule – temporary vs. permanent
For most programmable thermostats, you’ll either be able to edit the thermostat permanently or make a temporary change.
Temporary schedule changes should be made when you want to edit the schedule for a short period of time and then return to the previous schedule going forward. For example, you may choose to set the temperature control for your AC a few degrees higher than normal when you’re out of town on vacation.
This will keep your home from becoming stifling while you’re away, but reduce unnecessary energy consumption.
Permanent schedule changes should be made when you are updating the target temperature for a season, or if you are troubleshooting your thermostat or temperature calibration.
Permanent schedule changes will override the previous/existing schedule, although it will still take up a portion of the device’s memory. You should perform a factory reset occasionally to clear the memory and keep your thermostat working properly.
How to clear the schedule on a Honeywell thermostat
Honeywell produces a wide selection of thermostats – including some under the Residio name, although newer models under that brand are exclusively for commercial use. Honeywell Home thermostats come in non-programmable, programmable, and smart varieties.
Of these, you may need to know how to clear the schedule on the latter two (there is no schedule option on the first, as it’s non-programmable).
The schedule on most Honeywell thermostats can be cleared by holding down the HOLD button on the device. Some thermostats require a different reset method, while others may require a full factory reset to clear the schedule.
The best way to know how to clear the schedule on your Honeywell thermostat is to consult the manufacturer’s directions.
Keep reading for a detailed guide on how to clear the schedule on the popular Honeywell thermostats, including:
- Clearing the schedule on a Honeywell 5-1-1 thermostat or 7-Day Programmable Thermostat
- Clearing the schedule on a Honeywell Pro 2000 Series Thermostat
- Clearing the schedule on a Honeywell VisionPRO 8000 Thermostat
- Clearing the schedule on a Honeywell T5 Thermostat
- Clearing the schedule on a Honeywell T6 Thermostat
- Clearing the schedule on a Honeywell T9 Thermostat
- Clearing the schedule on a Honeywell T10 Thermostat
Or read this article to find out how to take your thermostat off the wall.
Clearing the schedule on a Honeywell 5-1-1 thermostat or 7-Day Programmable Thermostat
The Honeywell 5-1-1 (RTH7460D1000) and 7-Day Programmable (RTH7560E1001) thermostats are staples of the Honeywell Home line. They are both programmable but do not have either smart sensors or WiFi capability, making them ideal for most homes.
To temporarily override the programmed schedule on a Honeywell programmable thermostat:
- Press the <+> or <-> to adjust the temperature to your desired level.
- No further action is needed; the temperature will remain set until the next scheduled time period. That means this action will only override the current time period, then return to the regular schedule.
- To cancel the temporary hold, press the <+> or <-> then press Cancel.
To permanently override the programmed schedule on a Honeywell programmable thermostat:
- Press <+> or <-> to adjust the temperature to your desired level.
- The words TEMPORARY HOLD will be displayed. While the temperature is flashing, press the Hold (or Mode, depending on your model) button to change to Permanent Hold. This setting will hold the temperature at your desired setting and prevent the next time period from resetting the schedule.
- To cancel the Permanent Hold, press + or – and then press Cancel.
To clear the schedule on this type of Honeywell thermostat, you’ll need to perform a factory reset. While the manufacturer’s directions do not include instructions on how to do this, many Honeywell thermostats can be reset by following these directions:
- Remove the batteries.
- Put them back in backward, and leave it that way for 10 seconds.
- Remove the batteries and put them back in properly.
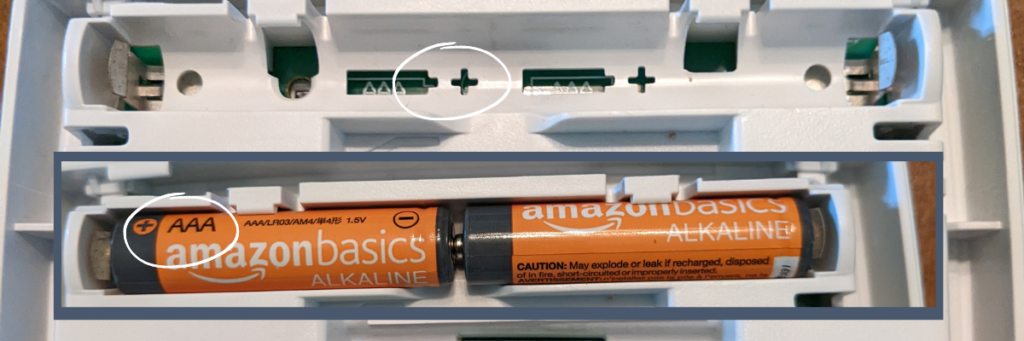
If this doesn’t work, Honeywell recommends contacting their customer support line for further assistance.
These directions apply to all thermostats in the RTH7400 and RTH7500 series.
Clearing the schedule on a Honeywell Pro 2000 Series Thermostat
The Honeywell Pro 2000 Series is a basic thermostat that is about half a step up from the 5-1-1 or 7-Day models. The primary distinction is that the Pro 2000 includes a setting for Emergency Heat, meaning it can use an auxiliary heating system when the primary heater can’t produce enough heat to warm the room.
This thermostat is available in both horizontal and vertical configurations. The operating procedures are the same for both models.
To temporarily override the programmed schedule on a Honeywell Pro 2000 thermostat:
- Press the <+> or <-> to adjust the temperature to your desired level.
- No further action is needed; the temperature will remain set until the next scheduled time period. That means this action will only override the current time period, then return to the regular schedule.
- To cancel the temporary temperature setting, press RUN.
To permanently override the programmed schedule on a Honeywell Pro 2000 thermostat:
- Press and hold SET until “Set Schedule” is displayed.
- Press the up or down arrows to set the Monday wake time, then press SET.
- Press the up or down arrows to set all subsequent time periods. You will be able to set the weekday (M-F), Saturday, and Sunday periods for Wake, Leave, Return, and Sleep.
- Once you’ve programmed your entire sequence, press RUN to save and exit.
To completely clear the schedule on this thermostat, you’ll need to perform a factory reset. Remove the batteries, put them back in backward, and leave them for 10 seconds. After that, you can remove the batteries and put them back in properly. The thermostat should be returned to its default settings, and the schedule will be cleared.
These directions apply to Honeywell thermostats in the Pro 2000 series, including the TH2110DH, TH2210DH, TH2110DV, and TH2210DV. I have the Honeywell RTH2300B1038 and the method is the same for it as well.
Clearing the schedule on a Honeywell VisionPRO 8000 Thermostat
The Honeywell VisionPRO 8000 line of thermostats is WiFi-enabled and allows you to set your schedule, adjust the temperature in your home, and track energy usage through the Residio Total Connect app. It also works in conjunction with several popular smart home systems, including Alexa and Google Assistant.
To reset the schedule on your Honeywell VisionPRO 8000 Thermostat:
- Press SYSTEM on the touchscreen display.
- Press and hold the 3rd empty box across the bottom of your screen.
- Change the left number to 0165. Change the right number to 1.
- Press DONE.
If that doesn’t work and you find you need to perform a factory reset, the process is similar, but with a different left number:
- Press SYSTEM on the touchscreen display.
- Press and hold the 3rd empty box that appears at the bottom of the screen.
- Change the left number to 0710. Change the right number to 1.
- Press DONE.
These directions apply to most VisionPRO 8000 thermostats, including the TH8320WF and the RTH858WF). Keep reading for how to reset a VisionPRO TH8321WF.
Clearing the schedule on a Honeywell VisionPRO 8000 TH8321WF Thermostat
The VisionPRO TH8321WF is similar to the VisionPRO 8000 Thermostat, but is currently being shifted to the Residio brand and is more often seen in commercial applications. That being said, it is slightly more complicated and requires a different process to clear the schedule.
As with most WiFi-enabled thermostats, you can easily update the current schedule by adjusting the target temperature in the app.
To clear the schedule on your Honeywell VisionPRO Thermostat:
- Press MENU on the touchscreen display.
- Press <i> until you see PREFERENCES; select it.
- Press <i> until you see DEFAULT SCHEDULE; select it.
If that doesn’t solve your problem, you’ll need to perform a factory reset:
- Press MENU on the touchscreen display.
- Press <i> until you see DEALER INFORMATION; select it.
- Scroll to the bottom and write down the 4-digit date code.
- Press done to exit this screen and return to the main menu.
- Press <i> until you see INSTALLER OPTIONS.
- Enter the 4-digit date code.
- Select RESET TO DEFAULTS.
- Select YES.
Keep in mind that you’ll need to reconnect the WiFi, app, and any other smart accessories after a full reset. All of those settings will be lost.
Clearing the schedule on a Honeywell T5 Thermostat
The Honeywell T5 Thermostat is a smart thermostat that allows you to check and control the temperature in your home from the Residio Smart Home app.

As with most WiFi-enabled thermostats, you can easily update the current schedule by adjusting the target temperature in the app. The Consumer Reports review indicates that it is possible to program a vacation schedule, but this function is only available through the app.
There are two ways to clear the schedule on your Honeywell T5 Thermostat. The best way is to:
- Press and hold MENU on the touchscreen display.
- Press the > symbol until RESET appears; select it.
- If it doesn’t automatically appear, press the > symbol until you see SCHEDULE; select it.
If that doesn’t fix your problem, you’ll probably want to perform a factory reset:
- On the main screen, press and hold the MENU button for 5 seconds. This will bring up the Reset Menu.
- Press the > symbol until RESET appears; select it.
- The first option that appears will be FACTORY; select it.
- If you press the > symbol, you will be able to select SCHEDULE. This is the second way to clear the schedule on this device.
Clearing the schedule on a Honeywell T6 Thermostat
The Honeywell T6 Thermostat functions in very much the same way as the T5. All of the functions for clearing the schedule and resetting the device are the same.
Clearing the schedule on a Honeywell T9 Thermostat
The Honeywell T9 Smart Thermostat allows you to place sensors throughout your home, allowing you to balance the temperature throughout your home. The temperature can be adjusted through either the touchscreen interface or the Residio app, and can be connected with all leading smart home systems, including Alexa, Google Assistant, and the Apple HomeKit.
As with most WiFi-enabled thermostats, you can easily update the current schedule by adjusting the target temperature in the app. The Consumer Reports review indicates that it is possible to set a vacation schedule, but this function is only available through the app.
The Honeywell Home T9 was one of our top-rated smart thermostats for 2022!
To temporarily change the programmed temperature directly on your thermostat:
- Press the <+> or <-> to adjust the temperature to your desired level.
- No further action is needed; the temperature will remain set until the next scheduled time period. That means this action will only override the current time period, then return to the regular schedule.
- To cancel the temporary temperature setting, press the <+> or <-> and then press CANCEL.
To add a new programmed temperature profile directly on the thermostat:
- Tap the touch screen to toggle away from the idle screen, which only displays the time, ambient temperature, and local weather.
- Press the Menu Icon (the three lines at the bottom center of the screen).
- Select “Schedule.”
- Select “Schedule Options.”
- Create a new schedule by selecting the day, time, temperature, and fan mode for each time period.
To clear the programmed schedule on your T9 thermostat:
- Press the Menu Icon (the three lines at the bottom center of the screen).
- Scroll down to “Advanced Setup”; select it.
- Select “Reset.”
- Select “Schedule Reset.”
If you find yourself requiring a factory reset, you should:
- Press the Menu Icon (the three lines at the bottom center of the screen).
- Scroll down to “Advanced Setup”; select it.
- Select “Reset.”
- Select “Factory Reset.”
These directions apply to all Honeywell T9 thermostats, including the RCHT9510WF and the RCHT9610WF.
Clearing the schedule on a Honeywell T10 Thermostat
The Honeywell T10 Pro Smart Thermostat allows you to place sensors throughout your home, in order to balance the temperature throughout your home. The temperature can be adjusted through either the touchscreen interface or the Residio app and can be connected with all leading smart home systems, including Alexa, Google Assistant, and the Apple HomeKit.
As with most WiFi-enabled thermostats, you can easily update the current schedule by adjusting the target temperature in the app.
To temporarily change the programmed temperature directly on the thermostat:
- Press Off Mode on the main screen to deactivate the current program.
- Select the Heat or Cool icon, depending on whether you want to heat or cool your home. Select Done.
- Use the up and down arrows to select the new target temperature.
- The temperature will be maintained until the next programmed time takes effect. (This time will be indicated by a button that says, “Hold until [time].”
- To extend the hold until a later time, click that button and choose either “Next Period,” “A Specific Time,” or “Hold Permanently.”
- To remove the hold, click on “Hold until [time]” and select “Remove Hold.”
To permanently clear the schedule on the Honeywell T10:
- Press the Menu Icon.
- Scroll down to “Thermostat Information.”
- The Date Code will be displayed; write this down.
- Press the back arrow, then scroll down to “Installer Options.”
- You will be prompted to enter your password, this is the Date Code you wrote down in Step 3.
- Select “Reset.”
- Select “Schedule Reset.”
If you need to perform a factory reset on the T10, you’ll need to:
- Press the Menu Icon.
- Scroll down to “Thermostat Information.”
- The Date Code will be displayed; write this down.
- Press the back arrow, then scroll down to “Installer Options.”
- You will be prompted to enter your password, this is the Date Code you wrote down in Step 3.
- Select “Reset.”
- Select “Factory Reset.”
These directions apply to the Honeywell T10 Thermostat, specifically the THX321WF, and the T10+ Pro Smart Thermostat.
Final thoughts on clearing the schedule of a Honeywell thermostat
Honeywell is one of the leading providers of commercial and residential thermostats and has various models available.
All Honeywell thermostats are relatively easy to use, although programmable options may need to be cleared occasionally if the schedule or the temperature sensor becomes inaccurate.
In most cases, this problem can be fixed by clearing the schedule, although, in some cases, a factory reset may be necessary.
If you still have the manufacturer’s directions, consult them for how to clear the settings on your thermostat. If you don’t, you’ll need to determine the model number by checking the back of your thermostat.
Consult the guide in this article to find out how to reset your specific device.
Let Us Know How We’re Doing!
Did this expertly prepared resource answer your question?
Do you have another question about home maintenance, home improvement projects, home appliance repair, or something else?
Get more information, send in questions and keep the discussion going by contacting the I’ll Just Fix It Myself company customer service team at at 1-800-928-1490 or Email us at [email protected]