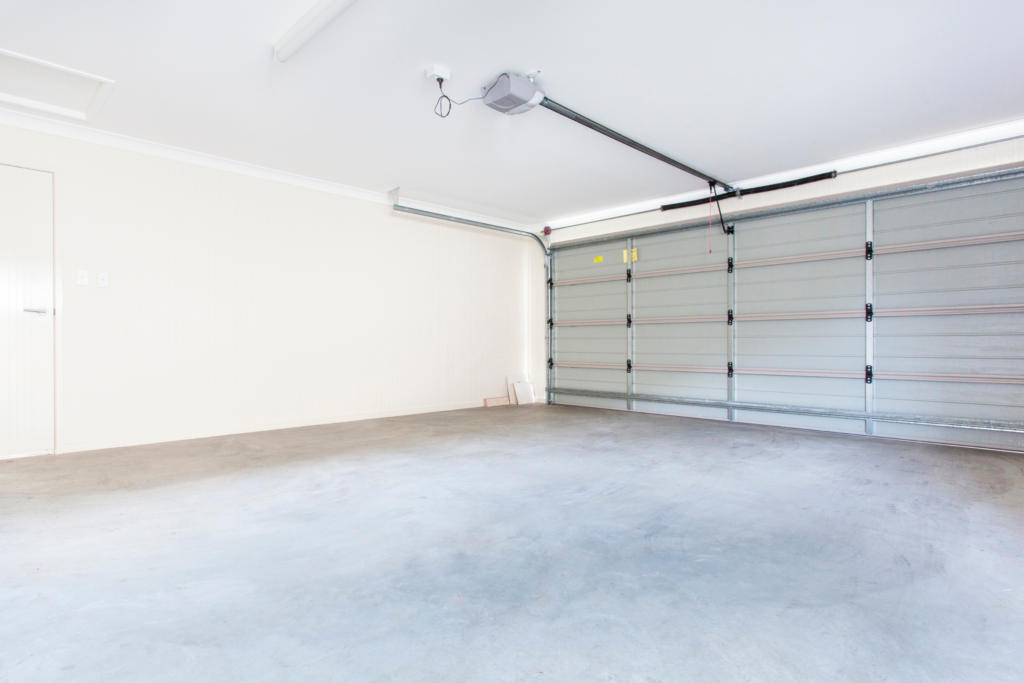
How To Insulate a Garage Ceiling Already Drywalled and Finished
You need to insulate your garage if you do various projects from there. But it’s also important to insulate the garage ceiling if you’ve rooms on top of it. This helps retain hot air during the cold season and makes the rooms above cool during summer. Insulating the ceiling is advisable to prevent losing heat from the main house through the garage.
You can insulate a garage ceiling easily by using blown-in loose fiberglass, fiberglass batting, or spray foam insulation. Typically, fiberglass batting is the easiest to work with but can be the most expensive. Blown-in fiberglass is often the cheapest method to insulate a garage but can be difficult and messy to install.
But how do you insulate a garage ceiling already drywalled? You shouldn’t remove the drywall on your garage ceiling if you want to insulate. Removing the drywall will interfere with its beauty and give you double work. Read on and understand how to insulate a garage ceiling already drywalled.
Can you Insulate a garage ceiling that’s already drywalled?
Yes. You can insulate your garage ceiling that’s already drywalled.
The main issue here is that if your garage ceiling is already drywalled then there isn’t an easy way to access the space without removing the drywall.
Fortunately, there are ways to add insulation without tearing down your drywall!
Is It Worth Insulating a Garage Ceiling That Is Already Drywalled?
Most homebuilders don’t spend the time or money required to insulate above a garage ceiling, even when it is finished, because it isn’t considered livable space and isn’t often climate controlled. However, the space above most garage ceilings is connected to the rest of the house in the attic which can reduce the overall effectiveness of attic insulation if you skip the garage ceiling.
It’s necessary to insulate your garage’s ceiling even if it’s already drywalled. Doing this makes it comfortable to use this room, especially in extreme temperatures. Insulating the ceiling of a drywalled garage also helps keep the rooms next to it warm during winter.
Additionally, you’ll be soundproofing your house if you insulate the garage, enabling you to do various noisy projects without affecting your neighbors.
Also, the items you store in the garage will last longer as the insulation will protect them from extreme cold or heat. Your energy bills will also reduce as you’ll not invest in other equipment to keep the house comfortable. But it’s advisable to insulate also the walls and door of your garage to get maximum benefits.
What to use to insulate a garage ceiling (finished or unfinished)
Insulation is important for reducing heating and cooling costs and improving comfort in homes. According to the Department of Energy, the most important factors for insulation are:
- The location and climate of your home
- The type and form of insulation you choose
- The R-value of the insulation, which measures its resistance to heat flow. The higher the R-value, the better the insulation.
It is also important to properly install and maintain insulation to ensure it functions correctly.
Here are the most common types of insulation for garage ceilings:
- Blown-in loose fiberglass
- Fiberglass batting
- Spray foam
Blown-in loose fiberglass
Blown-in loose fiberglass is a type of insulation made of small fibers of glass that are blown or sprayed into walls, attics, and other spaces using special equipment. The fibers interlock and create a thermal barrier that helps to reduce heat transfer and improve energy efficiency.
Some pros of using blown-in loose fiberglass insulation are:
- It is easy to install and can be used to fill irregularly shaped spaces.
- It is resistant to mold, mildew, and pests.
- It has a high R-value, which means it is an effective insulator.
Some cons of using blown-in loose fiberglass insulation are:
- It can settle over time, reducing its R-value and effectiveness.
- It can be a respiratory irritant if inhaled, so it is important to wear protective gear during installation.
- It can be more expensive than other types of insulation, such as cellulose.
Fiberglass batting
Fiberglass batt insulation is a type of insulation made of long fibers of glass that are woven together into a blanket-like form. The batts come in pre-cut panels or rolls and can be installed in walls, floors, and ceilings.
Some pros of using fiberglass batt insulation are:
- It is relatively inexpensive compared to other types of insulation.
- It is easy to install and can be done by homeowners with basic DIY skills.
- It is fire-resistant and does not absorb moisture, which makes it resistant to mold and mildew.
Some cons of using fiberglass batt insulation are:
- It can be difficult to install in tight spaces or around obstructions.
- It can lose effectiveness if not installed properly or if it becomes compressed over time.
- It can be a respiratory irritant if inhaled, so it is important to wear protective gear during installation.
Read Also: How To Insulate An Enclosed Porch Ceiling – Follow These Steps
Spray Foam Insulation
Spray foam insulation is a type of insulation made of polyurethane foam that is sprayed into walls, floors, and ceilings using special equipment. The foam expands and hardens, creating an airtight seal that helps to reduce heat transfer and improve energy efficiency.
Some pros of using spray foam insulation for ceiling insulation are:
- It creates an airtight seal that helps to prevent air leaks and reduce energy loss.
- It has a high R-value, which means it is an effective insulator.
- It can improve indoor air quality by reducing the infiltration of outdoor pollutants and allergens.
Some cons of using spray foam insulation for ceiling insulation are:
- It can be more expensive than other types of insulation.
- It requires professional installation and specialized equipment.
- It can be difficult to remove or modify once it has been installed.
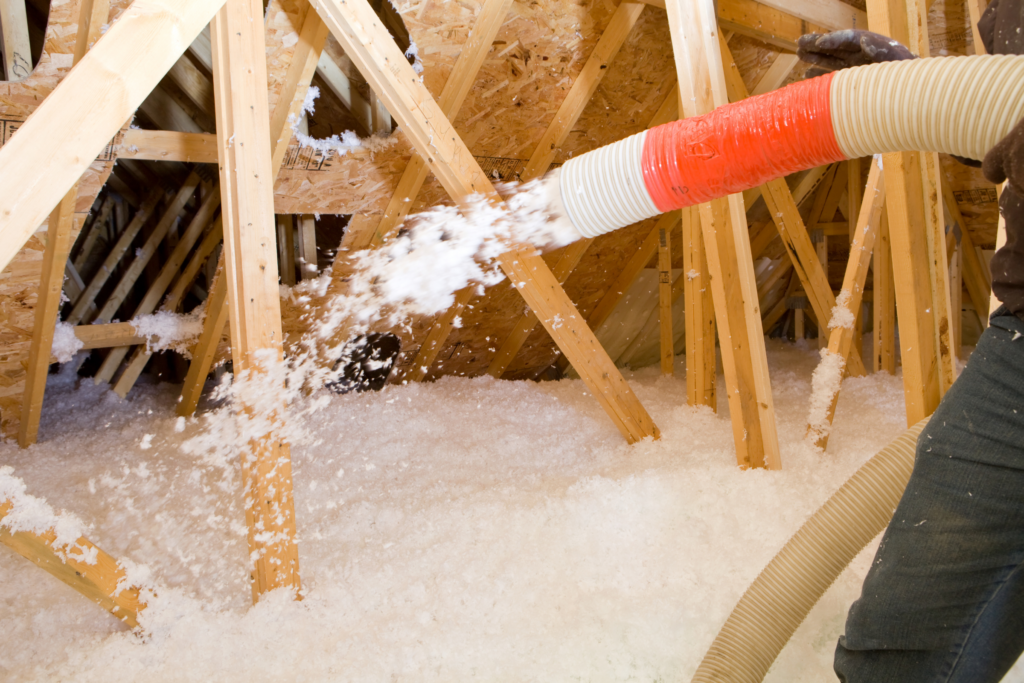
How to install blown-in loose fiberglass above a finished garage ceiling
Here are the steps to install blown-in loose fiberglass above a garage ceiling:
Materials and tools required:
- Blown-in loose fiberglass insulation
- Insulation blower machine
- Protective gear (gloves, goggles, dust mask)
- Measuring tape
- Utility knife
- Caulk or expanding foam (optional)
Steps:
- Measure the area of the garage ceiling you want to insulate to determine how much insulation you will need.
- Put on protective gear, including gloves, goggles, and a dust mask.
- Load the insulation blower machine with the blown-in loose fiberglass insulation.
- Locate the access point to the garage ceiling, such as a hatch or vent.
- Insert the hose from the insulation blower machine into the access point and turn on the machine.
- Use the hose to blow the insulation into the garage ceiling cavity, starting at the far end and working your way back toward the access point.
- Use a utility knife to trim any excess insulation that extends beyond the ceiling joists.
- Repeat the process until the entire area you want to insulate is filled with insulation.
- If there are any gaps or holes around the edges of the ceiling, use caulk or expanding foam to seal them.
Note: It is important to follow the manufacturer’s instructions for the insulation blower machine and the blown-in loose fiberglass insulation to ensure proper installation and safety.
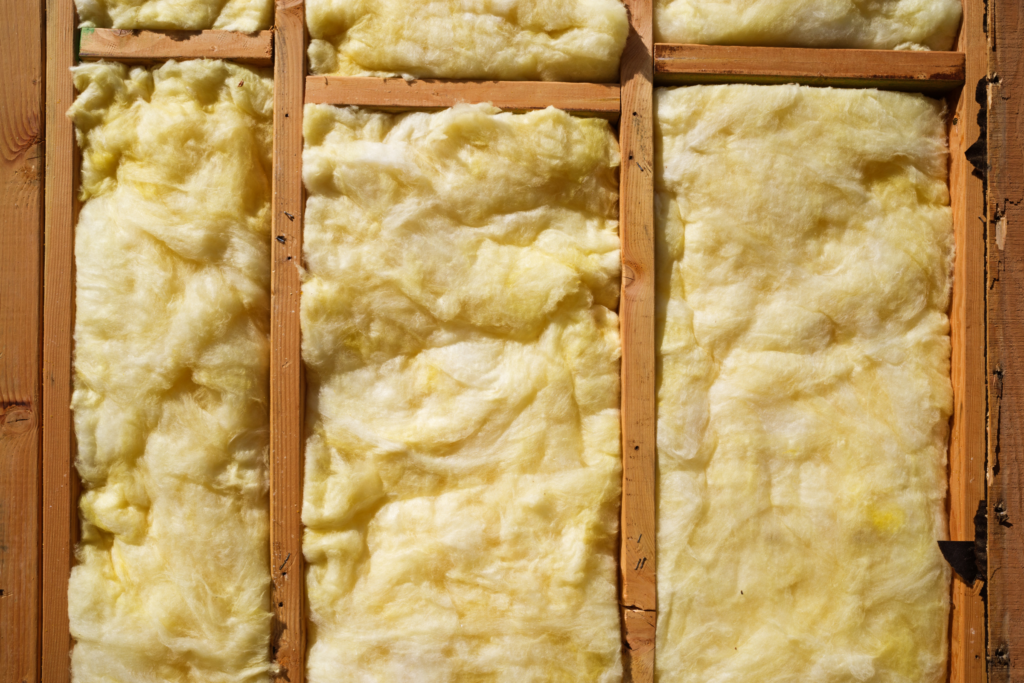
How to install fiberglass batting above a finished garage ceiling
Here are the steps to install fiberglass batting above a garage ceiling:
Materials and tools required:
- Fiberglass batting insulation
- Measuring tape
- Utility knife
- Staple gun
- Staples
- Ladder
Steps:
- Measure the area of the garage ceiling you want to insulate to determine how much insulation you will need.
- Put on protective gear, including gloves, goggles, and a dust mask.
- Cut the fiberglass batting insulation to the correct length using a utility knife.
- Place the insulation between the ceiling joists with the paper or foil side facing down.
- Press the insulation into place, making sure it fits snugly between the joists.
- Use a staple gun to staple the edges of the insulation to the sides of the joists.
- Continue installing insulation between the joists until the entire area you want to insulate is covered.
- If necessary, use a utility knife to trim any excess insulation that extends beyond the ceiling joists.
Note: It is important to wear protective gear and handle the fiberglass batting insulation carefully to avoid skin irritation. Make sure to follow the manufacturer’s instructions for the insulation and any tools used for installation.
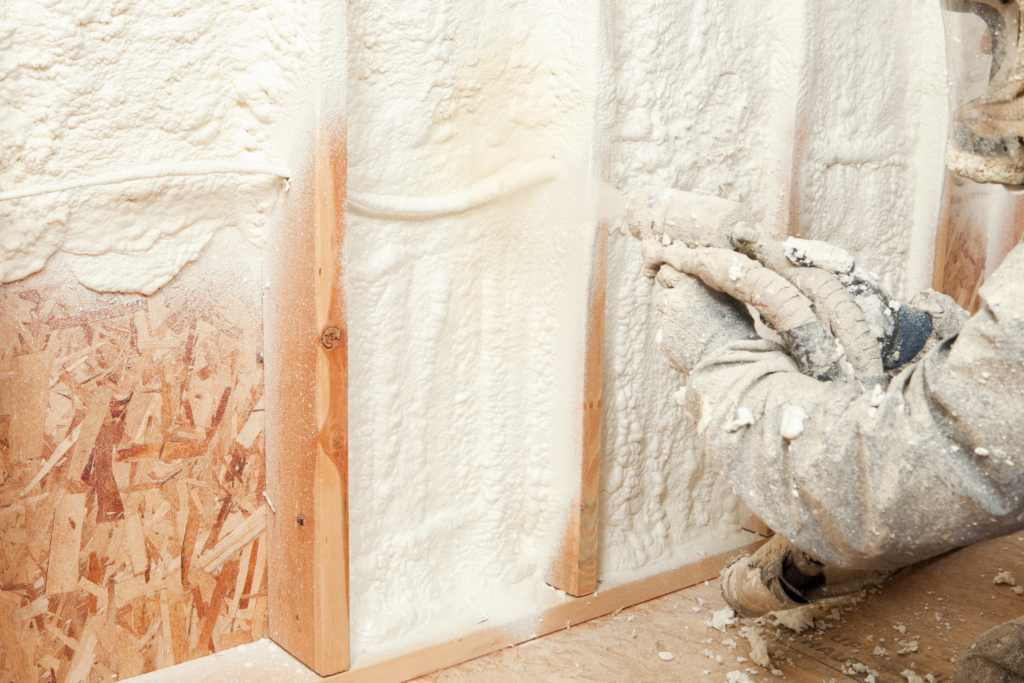
How to install spray foam insulation above a finished garage ceiling
Here are the steps to install spray foam insulation above a garage ceiling:
Materials and tools required:
- Spray foam insulation
- Spray foam insulation kit
- Protective gear (gloves, goggles, dust mask)
- Measuring tape
- Utility knife
- Caulk or expanding foam (optional)
Steps:
- Measure the area of the garage ceiling you want to insulate to determine how much insulation you will need.
- Put on protective gear, including gloves, goggles, and a dust mask.
- Set up the spray foam insulation kit according to the manufacturer’s instructions.
- Use the spray foam insulation kit to spray the foam insulation onto the garage ceiling, starting at the far end and working your way back toward the access point.
- Use a utility knife to trim any excess insulation that extends beyond the ceiling joists.
- Repeat the process until the entire area you want to insulate is covered with the foam insulation.
- If there are any gaps or holes around the edges of the ceiling, use caulk or expanding foam to seal them.
Note: It is important to follow the manufacturer’s instructions for the spray foam insulation kit and the spray foam insulation to ensure proper installation and safety.
Important safety considerations when adding insulation to your attic space
Although generally a pretty easy project, there are always concerns to keep in mind when working in the attic:
- Hazards associated with getting in and out of the attic such as falling through the ceiling or off the ladder
- Hazards associated with moving around in the attic such as tripping or stepping through the ceiling
- Exposure to hazardous materials in the attic such as asbestos or mold
- Inhaled fibers from insulation can lead to health issues, including cancer
- Overheating in the attic during hot weather
- Chemical off-gassing from improper installation of insulation can cause respiratory problems
Bottom Line
Insulating a garage ceiling, especially a finished garage, can be a great way to improve the overall energy efficiency of your home, potentially reducing power bills in both the winter and the summer.
Although there is a significant upfront cost of materials, adding insulation to your garage is a job that most homeowners can do for themselves in a weekend.
Choose the insulation type that makes sense for your budget and skillset for best results and don’t be afraid to ask your buddy for a little help when needed!
Check Out Our Other Popular Posts:
Let Us Know How We’re Doing!
Did this expertly prepared resource answer your question?
Do you have another question about home maintenance, home improvement projects, home appliance repair, or something else?
Get more information, send in questions and keep the discussion going by contacting the I’ll Just Fix It Myself company customer service team at at 1-800-928-1490 or Email us at [email protected]