Where does the air from the bathroom vent go? (9 Easy Steps to Install a Bathroom Vent)
Bathroom vents are extremely useful. Without them, you’d be dealing with fogged-up mirrors and persistent odors. But have you ever wondered, “Where does the air from the bathroom vent go?” If so, you’ve come to the right place. In this article, we’re going to discuss the ins and outs of bathroom venting and show you exactly how a bathroom vent works and where the air actually goes. Stick around!
You can have the bathroom vents run to the attic or through the sidewalls and outdoors. Another way is to fix it through the roof or the soffit. But you have to ensure your bathroom vent goes outdoors.
Read on and learn more about venting air out of your bathroom as we answer the question, “Where does the air from the bathroom vent go?”

How Bathroom Ventw Work
Your bathroom is one of the rooms that’s prone to experience constant moisture all day long. High moisture levels make it stay damp if there’s no good airflow. So, you need to install vents and bathroom extractor fans to improve the airflow and enable the room to stay fresh, odorless, and mold-free.
If you want the fan to work effectively, you’ve got to install it closer to the source of humidity/moisture. The fan’s vent will also help do away with hazardous fumes or chemicals from the bathing/cleaning agents.
The best thing about bathroom fans is that they work quietly, making them suitable for indoor use. They are also power-efficient, but the great question that arises when you opt to install bathroom fans is,
Where does the air from the bathroom vent go?
Where should the air from the bathroom vent go?
You should ensure the bathroom vent goes towards the roof and to the outdoors to improve the airflow in this room. Installing a bathroom fan into the attic can help remove condensation and noxious odors from your bathroom. The roof is a perfect location because there is a lot of air on the upper surface.
But you can also have it on the wall depending on your technician’s preference and the fan’s design. Additionally, the fan should be installed directly above area that experiences more moisture content. This can be the tub or shower.
Installing Vent on The Wall
If you opt to install a wall-mounted fan in your bathroom, the vent has to be through the walls. This is a more invasive but simpler way to vent your bathroom. You can install such a fan on the exterior or interior wall, though it’s impossible to use it in a bathroom with a cathedral ceiling. The vent needs to be outside the wall, depending on the fan’s location. You can decide to make long or short ductwork according to the situation to prevent leakages.
You can also consider having the ductwork pass through the exterior wall. If you opt for this, you will vent the fan directly from the outside wall, and it helps reduce your workload.
Through The Roof
Alternatively, you can let the bathroom vent go through the roof. This works for ceiling-mounted bathroom fans, which are the common types in the market. When installing such a fan, you should make it face upside-down for it to suck up the moisture odors and steam in the bathroom. You should fix the ductwork on the attic space which suctions the air to the roof.
You need to make a hole through the roof where you will install the vent. This is something you can’t do alone but requires a professional.

How To Install A Bath Vent Fan
If you want your bathroom to stay moisture-free and fresh, you should install a vent or a bathroom extractor fan. Your bathroom without a fan will make the moisture move to the walls causing mold and mildew, peeling paint, or blisters.
You can achieve that by following the steps below.
1. Make A Reference Hole
- To achieve this, draw a mark on the ceiling where you will install the fan. This should be between the shower and toilet for the best results.
- Using a 3/8-inch diameter spade bit, drill a reference hole in the ceiling to the attic. Then remove any insulation on the attic and use the reference hole to guide you on the exact location of the fan.
- Take the measurements of the vent fan housing by positioning it directly between the joist around the reference hole. But be keen on the nearby pipes or obstacles.
- After that, you should mark your ceiling and measure the dimensions of your fan’s intake port to know the size of the hole you should make. Let the reference hole guide you in transferring the measurements from the attic to the ceiling. With a framing square, sketch the outline of the intake port on the ceiling.
2. Drill The Intake Port Hole
Use a jigsaw to cut out the layout lines. Ensure you wear protective gear, then support the waste piece with your hand to prevent it from falling when you’re about to finish.

3. Affix The Fan
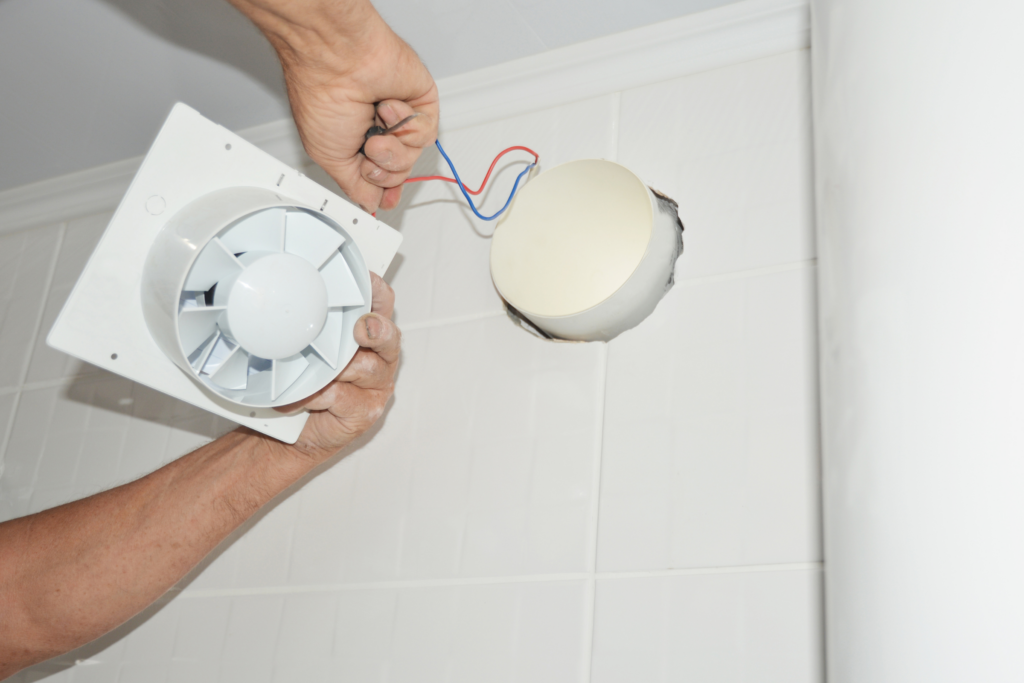
The next thing you need to do is attach the duct elbow to the outlet port beside the vent fan housing in the attic. Let the elbow remain straight, then hold it to the port using foil duct tape. Then detach the knockout hole and connect a cable connector.
Place the four metal brackets into the tabs showing from the sides of the fan. after that, hold the fan in place between the hole and the joists.
Connect The Fan to The Joists
- You should then pull the brackets to attach them to the sides of the joists. If you manage to do that, secure the bracket ends using a 1 ½ inch drywall screw.
- After that, bring together the flexible duct with the elbow on the vent fan. Use foil duct tape to secure it in place.
- Carefully pass the electrical cables through the connector, then tighten the connector screw to hold the cable into place.

4. Make A Duct Hole Through the Wall
- Choose the best place on the sidewall inside the attic where the duct will get out of the house. This should be between two wall studs and 6 feet from the vent fan.
- You can take reference measurements to help you identify the right place to place the flexible duct from the outside.
- Then, mark the location on the wall with the help of the measurements. Use a 4-inch hole saw to cut the hole through the wall.
5. Connect The Exhaust Duct and The Wall Cap
After installing the wall cap from the outside, it’s time to have it in the attic. Pull the free end of the exhaust duct and have it stretch to the outside wall. Then, connect the duct end to the wall cap connector duct using foil duct tape.
6. Fix The Wall Cap
After that, you should hold the 12-inch-long connector duct to the wall cap using duct tape. Push the wall cap from outside into the duct hole and let it hold tightly against the house siding. Fill the remaining spaces where the wall cap leaves on the siding with a foam rubber gasket.
Then detach the wall cap and spread silicon adhesive on the siding and gasket. Place the wall cap into the hole and press it against the siding. Use 1 ½ inch steel screws to hold the wall cap to the siding.
7. Connect The Wires
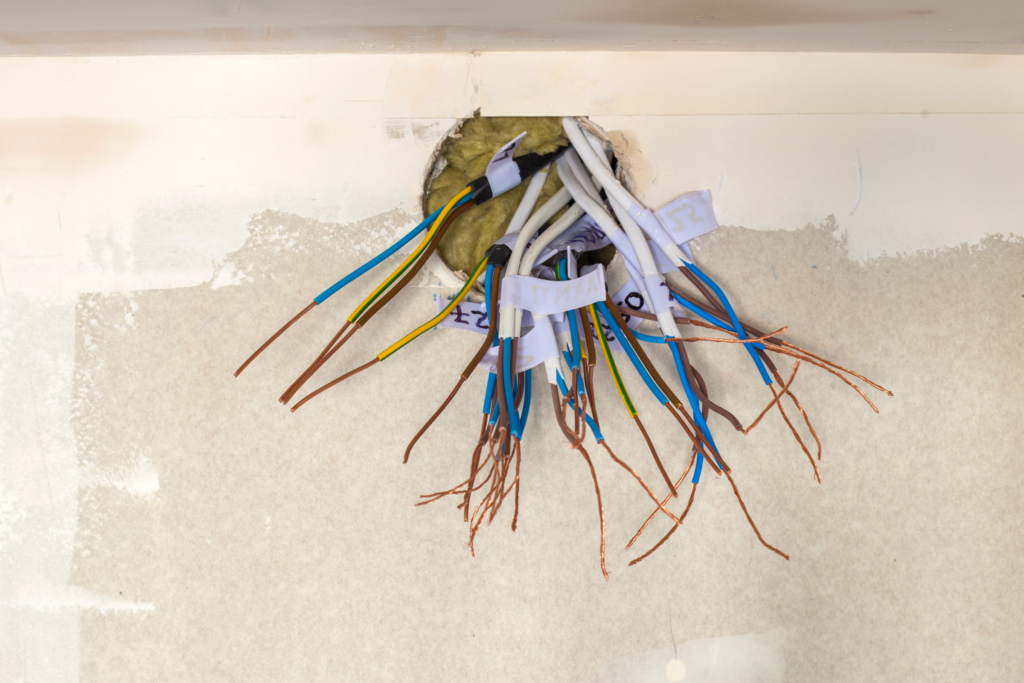
The next thing you should do to have your vent fan working is to connect the wires. Ensure you join the same color wires as the ones from the cable. Then put the electrical receptacle in place and firmly secure it with two screws that you remove before making the connections.

8. Attach The Grill
Finally, you should fix the blower motor in the ceiling and plug it into the electrical receptacle. Then have it hold well into the housing using screws.
Bring the fan grill to the ceiling and slide its wires into the slots on the fan housing. Push it up until it holds tight against the ceiling. Then, test if your bathroom vent fan is working.
Summary of Where does the air from the bathroom vent go?
So, where does the air from the bathroom vent go?
Typically the bathroom vent goes directly out of an exterior wall, or it’s vented through the attic and soffits. The bathroom vent is important as it helps regulate airflow in this room, preventing mold and mildew. However, you need to direct the vent into the roof or wall for it to give the desired results. Also, install the vent fan near the moisture source like the bathtub or shower to help regulate the water levels.
But don’t forget to choose the right bathroom vent fan, which will give you the desired results within no time. You can work with a professional to help you install the fan in the bathroom to avoid making errors that can be costly to repair.
Can the bathroom vent go down?
A bathroom vent can technically go down, but it is not recommended for a few reasons. One reason is that if there is any kind of blockage in the vent line, the build-up of moisture and humidity can cause damage to the roof or ceilings below. Another reason is that the moist air being expelled from the bathroom can attract pests like bugs or rodents. A third reason is that the smell of moist air can be unpleasant and linger in the home.
Where Do Basement Bathroom Vents Go?
Basement bathroom vents go to the roof. They are connected to the roof through a pipe that runs up the side of the house. The pipe is usually covered with a metal or plastic vent cover. The purpose of the vent is to allow air to flow out of the bathroom and keep moisture from building up inside the house.
Is It OK To Vent The Bathroom Fan Into The Soffit?
There is no definitive answer to this question, as the best way to vent a bathroom fan will vary depending on the specific situation. In some cases, it may be appropriate to vent the fan into the soffit, while in other cases, it may be better to vent it elsewhere. Factors that should be considered when making this decision include the size and layout of the home, the type of fan used, and the climate.
How do you vent a bathroom fan from the attic to the outside?
The fan can be vented to the outside by using a duct that runs from the attic to the exterior of the building. The duct can be made of metal or plastic, and it should be sealed so that there is no air leakage. The fan should also be connected to a GFCI-protected outlet so that it will turn off if there is a power outage.
How Do You Vent A Bathroom Fan From The Attic To The Outside?
The fan can be vented to the outside by using a duct that runs from the attic to the exterior of the building. The duct can be made of metal or plastic, and it should be sealed so that there is no air leakage. The fan should also be connected to a GFCI-protected outlet so that it will turn off if there is a power outage.
Does The Bathroom Fan Remove The Odor?
Bathroom fans are designed to remove excess moisture from the air, and they can help to reduce odors, but they are not specifically designed to remove odors. If you are looking for a fan that will remove odors, you may want to consider an exhaust fan, which is designed to remove both moisture and odors from the air.
What are the shower door glass options when considering placing the bathroom vent?
When it comes to renovating a bathroom, you’ll want to consider the useful shower door glass options available. Not only can the right shower door glass add a modern look to your bathroom, but it can also help regulate the ventilation of your bathroom. When installing a new shower door, be sure to check where the bathroom vent goes so that you can ensure proper airflow in your bathroom.
Is it OK to leave the bathroom fan on?
Leaving the bathroom fan on can help remove moisture from the air and can prevent the growth of mold and mildew. However, if the fan is left on for an extended period of time, it can consume a significant amount of energy. Additionally, if there is a window in the bathroom that can be opened to allow fresh air in, it may be more energy-efficient to leave the fan off.
Should I run the bathroom fan while showering?
The potential benefit of running the bathroom fan while showering is that it may reduce the moisture in the air and help to shorten the amount of time it takes for the bathroom to dry. However, there is also the potential for the fan to spread humidity and moisture throughout the house, so it is important to weigh the pros and cons before making a decision.
What is the best type of vent for a bathroom?
There is no one perfect type of vent for a bathroom, as different bathrooms will have different ventilation needs. However, some vents are better suited for bathrooms than others. For example, a bathroom with a lot of moisture and humidity would benefit from a vent that includes a fan, such as an exhaust fan. This will help to remove the moist air from the room, preventing it from building up and causing damage to the walls or fixtures.
We listed below a few vents for you based on popularity, but before making any decisions, it is always best to weigh the pros and cons or contact professionals.
You May Also Like:
Let Us Know How We’re Doing!
Did this expertly prepared resource answer your question?
Do you have another question about home maintenance, home improvement projects, home appliance repair, or something else?
Get more information, send in questions and keep the discussion going by contacting the I’ll Just Fix It Myself company customer service team at at 1-800-928-1490 or Email us at [email protected]
