12 Brilliant Holiday Decor Storage Hacks You’ll Wish You Knew Sooner!
The holiday season is a time of joy, celebration, and, let’s not forget, an abundance of decorations. From twinkling lights to festive wreaths, these items bring the spirit of the holidays to our homes.
But once the season ends, we’re often left with the daunting task of storing these treasures. Without a proper system, you can find yourself facing a cluttered mess that takes the cheer out of unpacking them next year.
That’s why savvy storage solutions are not just a convenience; they’re a necessity. They save time, preserve your holiday keepsakes, and make the setup for the next holiday season a breeze.
In this blog post, we’ll explore 12 brilliant holiday decor storage hacks that are both fun and practical. These ideas are designed to maximize space, minimize damage, and inject a little joy into the post-holiday organization.
1. Declutter Before Storing
Why This Works: Before you even think about storage, decluttering is essential. It’s the perfect opportunity to let go of broken or outdated decorations that no longer spark joy. This not only frees up space but ensures that you’re only keeping the items that truly matter.
Fun Ideas & Quick Tips:
- Make It a Family Event: Turn decluttering into a fun family affair with music and treats. It’s a great way to reminisce about past holidays as you sort through decorations.
- Donate With a Purpose: Set aside gently used items to donate. It’s a wonderful way to spread holiday cheer throughout the year.
- Keep, Repair, Toss: Create three categories as you declutter – keep, repair, or toss. This simplifies decision-making and keeps you organized.
2. Label and Color Code Storage Bins
Why This Works: When it comes to finding your holiday decorations next year, nothing beats the efficiency of well-labeled and color-coded bins. This system allows you to quickly identify what’s inside without having to rummage through each container.
Fun Ideas & Quick Tips:
- Get Creative with Labels: Use a label maker or print out your own festive labels. You can even involve the kids by having them draw pictures representing the contents.
- Color Coordination: Assign a specific color for each holiday. For example, use red bins for Christmas, orange for Halloween, and pastel colors for Easter.
- Visible Inventory: Place a list of contents inside a clear pocket on the outside of each bin, or use a dry-erase marker to jot down the items on the bin itself.
By starting with these first two steps, you’re setting the stage for a more organized and less stressful post-holiday clean-up. Stay tuned for the remaining hacks that will make storing your holiday decor a breeze.
3. Repurpose Household Items for Ornament Storage
Why This Works: Utilizing items you already have around the house for storage is not only cost-effective but also environmentally friendly. Repurposing common household items can provide the perfect compartments to keep your delicate ornaments safe and organized.
Fun Ideas & Quick Tips:
- Egg Cartons for Smaller Ornaments: The compartments in egg cartons are ideal for cradling smaller ornaments. Plus, they stack easily in storage bins.
- Apple Containers for Larger Ornaments: Clear plastic apple containers from the grocery store can be repurposed to store larger ornaments. The individual sections help prevent ornaments from knocking into each other.
- Wine Boxes with Dividers: If you have any wine boxes with cardboard dividers, they can be excellent for keeping ornaments separated and protected. They’re sturdy and often have handles for easy transport.
4. DIY Cardboard Dividers for Light Strands
Why This Works: Tangled light strands are a common frustration when decorating for the holidays. Creating your own cardboard dividers is a simple and effective way to keep each strand neatly coiled and ready for use.
Fun Ideas & Quick Tips:
- Customized Cardboard Sheets: Cut cardboard pieces to fit inside your storage bins and cut notches to secure the ends of your light strands.
- Wrap and Label: Wrap each light strand around a piece of cardboard and label it, noting where you typically use it (e.g., “Tree,” “Mantle,” “Exterior”).
- Decorative Tape: Use colorful or patterned duct tape to reinforce the cardboard and add a bit of holiday flair to your storage system.
5. Hang Wreaths on Coat Hangers
Why This Works: Wreaths can be some of the bulkiest holiday items to store. By hanging them on coat hangers, you can keep their shape intact and reduce the space they take up. This method also makes it easy to see all your wreaths at a glance when it’s time to choose one for the door.
Fun Ideas & Quick Tips:
- Garment Bag Protection: Slip a garbage bag or garment bag over the wreath while it’s hanging to protect it from dust and cobwebs.
- Closet Storage: Hang the wreath in a spare closet or on a rack in the basement or garage. This keeps them out of the way and prevents flattening.
- Add a Scent: Tuck a scented dryer sheet into the garment bag to keep the wreath smelling fresh until next year.
6. Use Clear Shoe Organizers for Small Items
Why This Works: Clear shoe organizers are an inexpensive and versatile storage solution. They can hang over a door or on a wall, providing easy access and visibility for small, miscellaneous holiday items.
Fun Ideas & Quick Tips:
- Categorize Your Pockets: Assign each pocket a category, such as “Door Decor,” “Tabletop Trinkets,” or “Tree Accessories.”
- Quick Access: Use the organizer for items you decorate with first, so everything is at your fingertips when the holiday season begins.
- Label Each Pocket: If your shoe organizer isn’t clear, label each pocket with a photo or a written description of its contents.
7. Reel in the Lights
Why This Works: Light reels are specifically designed to keep your holiday lights from tangling, which saves you from the frustration of untangling them next year. If you don’t have a light reel, you can make a DIY version that works just as well.
Fun Ideas & Quick Tips:
- DIY Light Reels: Cut out a piece of cardboard in a “spool” shape or use a sturdy clothes hanger to wind your lights around.
- Keep It Tight: Secure the ends of the lights with twist ties or rubber bands to prevent them from unraveling.
- Stack and Store: Once wrapped, light reels can be neatly stacked in a storage bin, ready for the next season.
8. Vacuum Seal Seasonal Linens
Why This Works: Vacuum sealing your holiday-themed linens compresses them, saving valuable storage space. It also protects them from moisture, pests, and odors, ensuring they stay fresh for the next season.
Fun Ideas & Quick Tips:
- Organize by Room: Vacuum seal linens by the room they belong to, so you can easily grab the set you need when decorating.
- Label the Bags: Use a permanent marker to label the vacuum-sealed bags with their contents and the holiday they belong to.
- Refresh Before Use: Toss the linens in the dryer with a damp towel for a few minutes to fluff them up before displaying them again.
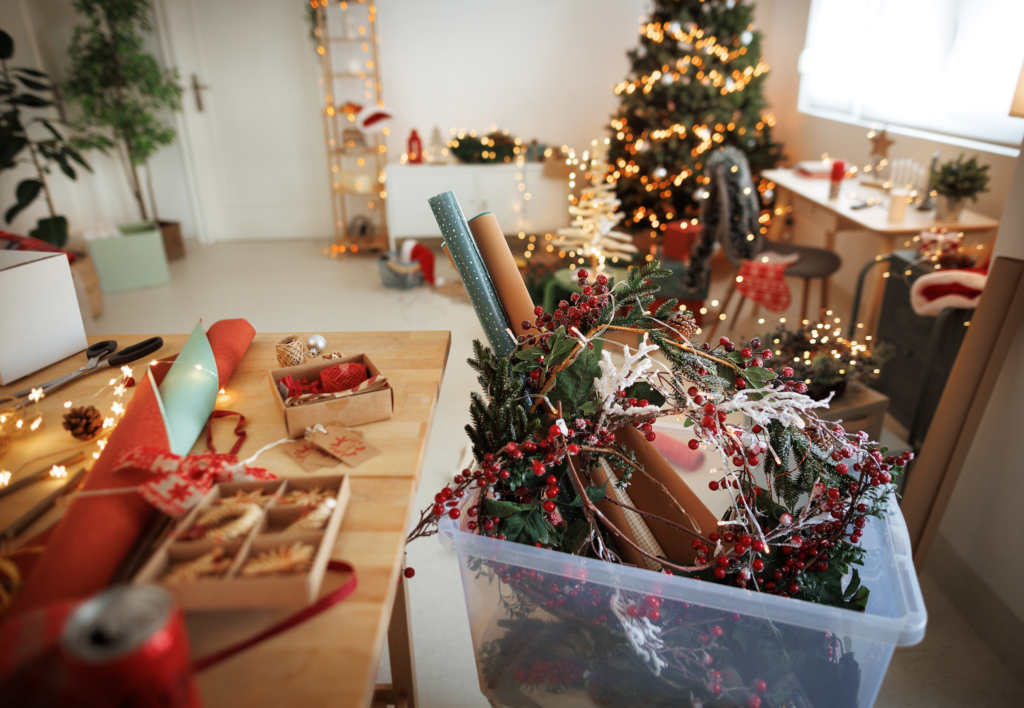
9. Store Wrapping Paper in Garment Bags
Why This Works: Wrapping paper rolls can be cumbersome to store without them unrolling or getting crumpled. Storing them in garment bags keeps them contained, protected, and easy to hang in a closet or on a hook, saving space and maintaining their condition.
Fun Ideas & Quick Tips:
- Hang in Unused Spaces: Use the back of a closet door or a little-used corner to hang the garment bag full of wrapping paper.
- Clip It Up: Use clothespins or clips to secure the bottoms of the rolls to the hanger so they don’t slip out of the bag.
- Easy Identification: Place a tag or a label on the outside of the garment bag listing the types of wrapping paper inside (e.g., “Christmas,” “Birthdays,” “All-Occasion”).
10. Utilize Ceiling or Wall Space in Garages
Why This Works: Most garages have unused space on the walls or ceiling that can be transformed into storage areas. By installing shelves, hooks, or racks, you can take advantage of vertical space to store bulky holiday decorations out of the way.
Fun Ideas & Quick Tips:
- Overhead Storage Racks: Install ceiling-mounted storage racks to hold large bins off the floor and out of the way.
- Pegboards for Versatility: Put up a pegboard with hooks to hang wreaths, garlands, and even light reels.
- Wall-Mounted Shelves: Use wall shelves to keep storage bins organized and easily accessible.
11. Protect Your Artificial Tree
Why This Works: Artificial trees can be one of the most challenging items to store due to their size and shape. Proper storage protects the tree from dust, pests, and damage, ensuring it remains lush and full for years to come.
Fun Ideas & Quick Tips:
- Tree Bags: Invest in a tree storage bag or create your own from an old bedsheet or tarp. Ensure the bag is large enough to fit your disassembled tree comfortably.
- Upright Storage: If space allows, consider storing your tree upright. This can be done by covering it with a sheet or bag and securing it in a corner of a storage room or garage.
- Label Branches: If your tree needs to be disassembled, label each section or branch with colored tape to make reassembly quick and easy next year.
12. Create an “Open First” Box
Why This Works: An “Open First” box is a great way to prioritize your decorations, making the decorating process smoother and more enjoyable. This box should contain all the essential items you need to begin decorating.
Fun Ideas & Quick Tips:
- Prioritize Must-Haves: Include items like your tree stand, a few favorite ornaments, or your string lights in this box.
- Stand-Out Labeling: Make sure this box is clearly labeled and easy to distinguish from the rest with bright colors or unique markings.
- Keep It Accessible: Store your “Open First” box last, so it’s the first thing you see when you open your storage area next holiday season.
Let Us Know How We’re Doing!
Did this expertly prepared resource answer your question?
Do you have another question about home maintenance, home improvement projects, home appliance repair, or something else?
Get more information, send in questions and keep the discussion going by contacting the I’ll Just Fix It Myself company customer service team at at 1-800-928-1490 or Email us at [email protected]