6 Home Improvement Projects with the Best ROI!
When it comes to home improvement projects, you may be wondering which ones will yield the best return on investment (ROI). After all, it’s important to know that the money and effort you put into upgrading your home will benefit you in the long run. So, let’s dive into five home improvement projects with the best ROI, as recommended by industry experts.
Six of the best ways to get a positive ROI on your home improvement revolve around major kitchen remodels, minor kitchen remodels, bathroom additions, garage door replacements, deck additions, and entry door replacements.
Keep in mind the specific needs of your household and the local housing market, as these factors can also influence the overall value and return on investment for each project.
Also, these projects are listed in no particular order, go ahead and use the table of content to jump to the one that interests you the most for a full breakdown of the steps involved!
6 Home improvement projects that offer a great ROI
When it comes to home improvement projects, you might be looking for ways to increase the value of your property while also enhancing its overall appeal. Home renovations and remodels can provide a substantial return on investment (ROI) if done correctly.
Firstly, it’s important to prioritize projects that not only improve the appearance of your home but also have a high potential for ROI. Some popular renovations that yield favorable returns include kitchen and bathroom remodels, as well as master suite additions and garage door replacements.
When it comes to home improvement projects, the following popular renovations tend to offer the best ROI:
| Project | Typical Cost (2021) | Average ROI (2021) |
|---|---|---|
| Major Kitchen Remodel | $65,000 – $130,000 | 54% – 68% |
| Minor Kitchen Remodel | $20,000 – $25,000 | 77% – 82% |
| Bathroom Addition | $45,000 – $55,000 | 50% – 60% |
| Garage Door Replacement | $1,100 – $2,300 | 94% – 98% |
| Deck Addition | $10,000 – $35,000 | 65% – 72% |
| Entry Door Replacement | $1,500 – $2,500 | 68% – 74% |
While it’s tempting to start by tackling the most expensive renovation projects, you should remember that lower-cost projects often reap bigger returns. For example, small improvements to your home’s exterior, such as sprucing up landscaping, can boost your house’s value by approximately 5% to 12%.
As you plan your remodeling project, it’s crucial to budget appropriately. Before starting any renovations, assess the cost of materials and labor, as well as the time it will take to complete the project. Sticking to your budget is an important factor in ensuring a high ROI for your remodeling efforts.
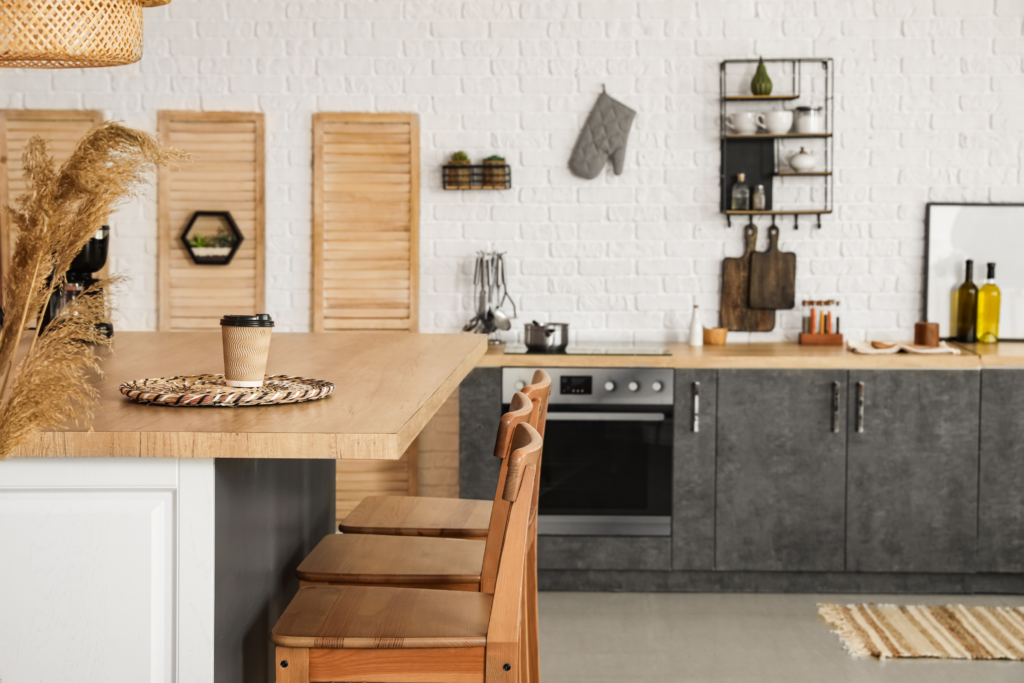
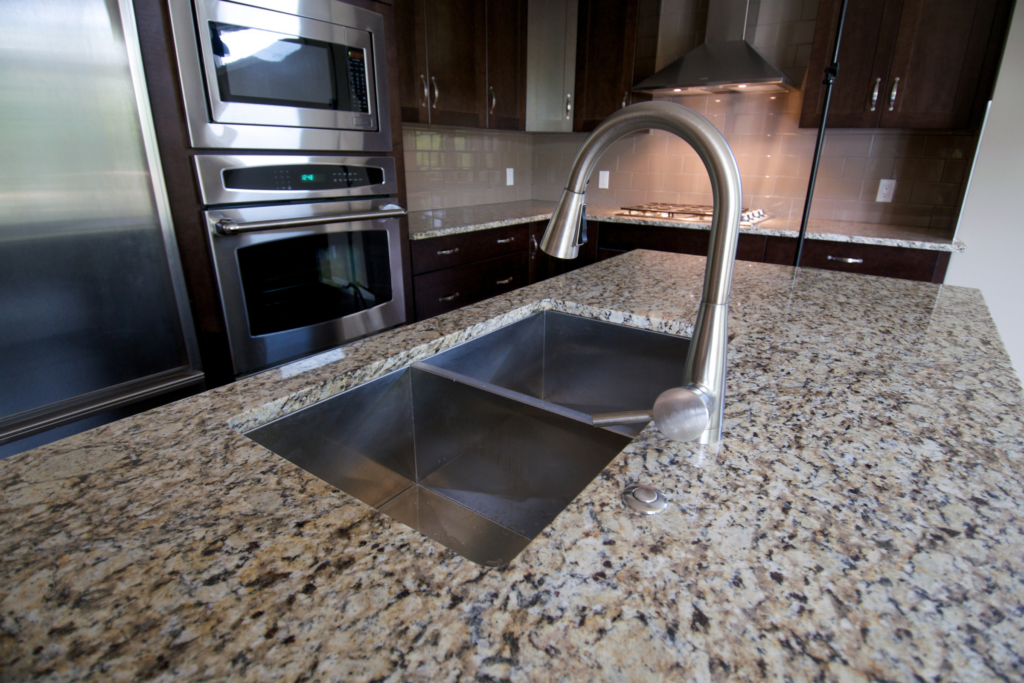
Major Kitchen Remodel
A major kitchen remodel typically involves a comprehensive overhaul of the entire kitchen space. This often means that not only are fixtures and finishes replaced, but often the layout is reconfigured to suit the homeowner’s needs better.
Here’s a breakdown of what’s typically involved in a major kitchen remodel:
- Planning and Design: This initial phase involves working with professionals to draft a detailed kitchen blueprint, defining its layout and overall aesthetic.
- Demolition: Here, the old kitchen elements are removed, including cabinets, appliances, and sometimes walls, to pave the way for the new design.
- Structural Changes: This step can involve either removing or relocating walls to optimize space, sometimes requiring additional support beams or columns.
- Electrical, Plumbing, and HVAC: Modernize the kitchen by updating electrical circuits, rerouting plumbing, and ensuring proper ventilation for new appliances.
- Installation of New Components: This involves putting in new elements like cabinets, countertops, appliances, and fixtures, transforming the kitchen’s appearance and functionality.
- Special Features: Enhancements like kitchen islands, unique storage solutions, or smart home integrations are added to customize and elevate the space.
- Finishing Touches: Add a fresh coat of paint, wallpaper, and decorative trims or moldings to round off the kitchen’s new look.
- Cleanup and Waste Disposal: All the remnants of construction are cleared away, and the space undergoes thorough cleaning to make it ready for use.
- Inspection: Local authorities may inspect the remodeled area to ensure the work aligns with building codes, especially after significant structural or utility work.
- Final Walkthrough: A concluding review with the contractor ensures all work meets the desired specifications, ironing out any last-minute adjustments.
Minor Kitchen Remodel
A minor kitchen remodel generally focuses on improving the existing kitchen’s appearance and functionality without significantly altering its layout or structure.
Here’s a brief description of each step involved in a minor kitchen remodel:
- Assessment and Planning: Understand the current state of the kitchen and decide on the updates required. This might involve consulting with a designer or doing some personal research.
- Refinishing Cabinetry: Instead of replacing all the cabinets, existing ones can be refinished or repainted. This could also involve updating cabinet hardware like handles and knobs.
- Countertop Replacement: Old countertops might be replaced with new ones, using materials like laminate, granite, or quartz, to give the kitchen a fresh look.
- Appliance Upgrade: Depending on their condition and age, some or all kitchen appliances (refrigerator, stove, dishwasher) might be replaced with newer, more energy-efficient models.
- Sink and Faucet Replacement: Upgrading to a modern sink design and a new faucet can notably improve kitchen functionality and aesthetics.
- Backsplash Update: Replacing or adding a new backsplash can greatly influence the kitchen’s visual appeal.
- Flooring Enhancement: Instead of a complete overhaul, the existing floor can be deep cleaned, repaired, or refinished. In some cases, a new floor might be laid over the old one.
- Painting and Wall Treatments: Freshening up wall paint or adding a new wallpaper can drastically change the kitchen ambiance.
- Lighting Improvements: Upgrading or adding new light fixtures, under-cabinet lighting, or pendant lights can brighten the space and add a touch of style.
- Final Touches: This could include adding decorative elements, window treatments, or new barstools for a kitchen island.
A minor kitchen remodel is typically quicker and less costly than a major one. It aims to maximize the kitchen’s potential by making a series of thoughtful, less-intensive upgrades.
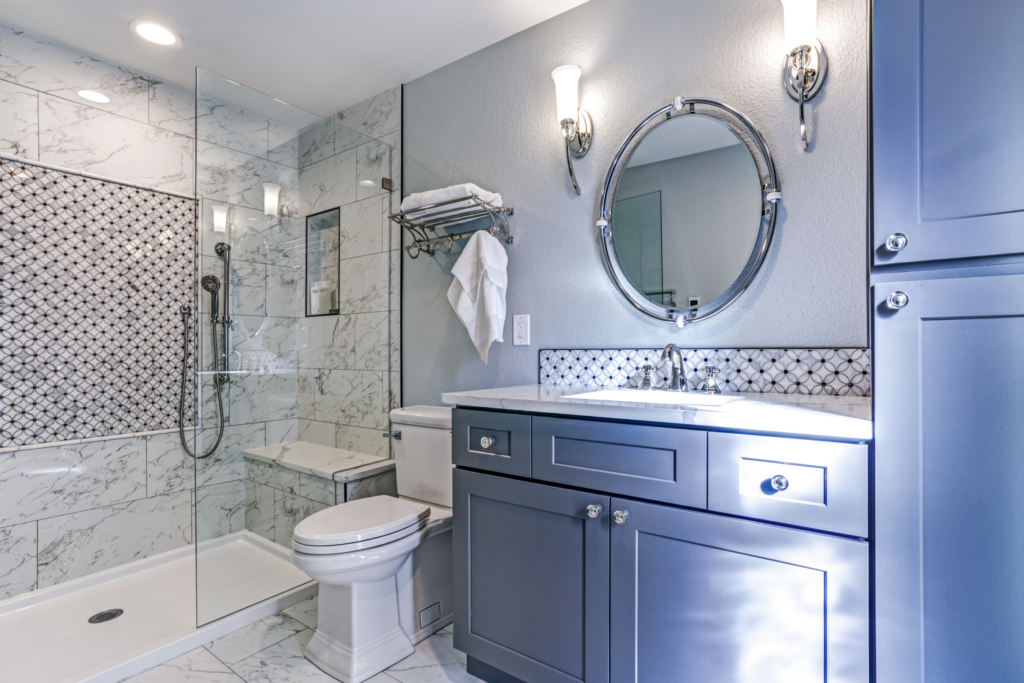
Bathroom Addition
Adding a bathroom to a home involves several critical steps and considerations, especially since it’s introducing entirely new plumbing and electrical systems to a previously non-bathroom space.
Here’s a description of each step involved in a bathroom addition:
- Planning and Design: Begin with a layout and design that takes into account the space available, desired features, and integration with the existing home structure.
- Obtaining Permits: Secure necessary building permits from local authorities. This ensures the addition meets local building codes and regulations.
- Site Preparation: The designated space is cleared, which may involve removing or relocating walls, flooring, or other obstacles.
- Plumbing Installation: New water supply and waste lines are added. This might involve connecting to the main house plumbing or even altering existing lines.
- Electrical Work: New electrical lines, outlets, and switches are added. Considerations include lighting, exhaust fans, and possibly heated floors or towel racks.
- Framing: Walls, ceilings, and possibly a new floor structure are framed out to define the bathroom space.
- Insulation: Install insulation in the walls and ceiling to ensure energy efficiency and comfort.
- Drywall and Painting: Once the framing and utilities are in place, hang drywall, then prime and paint the walls.
- Flooring Installation: Depending on the chosen design, this could involve laying tiles, vinyl, laminate, or other bathroom-appropriate flooring.
- Fixture Installation: Install essential fixtures like the toilet, sink, bathtub, or shower. This step may also include shower doors, cabinets, and countertops.
- Lighting and Ventilation: Install light fixtures, an exhaust fan, and any other desired electrical fixtures such as heated towel racks.
- Finishing Touches: Add accessories like towel bars, mirrors, shower curtains, or any other decorative elements.
Adding a bathroom can increase the value of a home significantly, especially if the house previously had only one bathroom. However, it’s a complex project that often requires skilled professionals in plumbing, electrical work, and general construction.
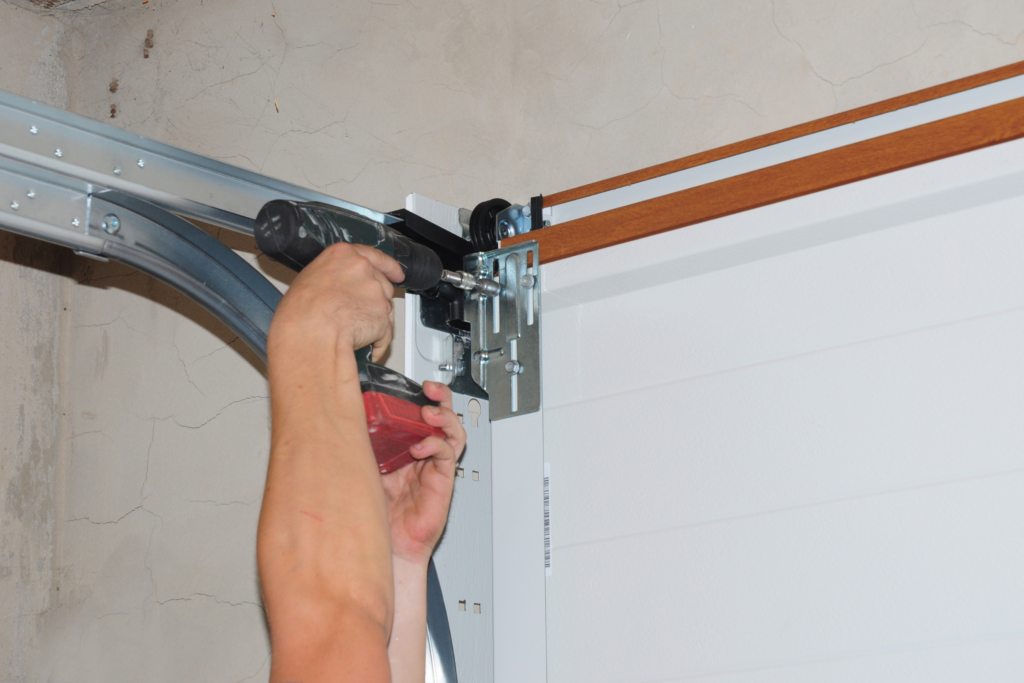
Garage Door Replacement
Replacing a garage door can significantly improve the appearance and functionality of a home’s exterior.
Here’s a brief description of each step involved in a garage door replacement:
- Assessment and Measurement: Evaluate the current garage door’s condition and measure its dimensions. This helps in selecting the right size and type for the replacement.
- Door Selection: Choose a new garage door based on material (wood, steel, aluminum, etc.), style, insulation needs, and budget. Options might include window inserts, colors, and panel designs.
- Removing the Old Door: Before the new door can be installed, the old door must be carefully taken down. This involves detaching the door panels, removing the old tracks and hardware.
- Preparation for Installation: Clean and prepare the garage door opening. Check and repair any damages to the frame or floor, ensuring a smooth installation.
- Installing the New Track and Hardware: Properly align and fix the new track system, ensuring it’s level and plumb. Install new brackets, rollers, and other required hardware.
- Setting Up the New Door: Depending on the design, garage doors usually come in sections. Start installing from the bottom, stacking each section upwards. Attach rollers and secure each section as you go.
- Installing the Springs and Opener: Depending on the door, you’ll be installing either a torsion spring system or extension springs. Ensure they are tensioned correctly. If the old opener is not compatible or is in poor condition, install a new garage door opener.
- Testing the Door: Once installed, manually test the door to ensure it opens and closes smoothly. Afterward, test it with the garage door opener to ensure automation works correctly.
- Sealing: Seal the edges of the garage door to prevent drafts and improve insulation. This might involve adding weather stripping or a bottom seal.
Remember, while many homeowners might feel confident to undertake a garage door replacement as a DIY project, working with the springs (especially torsion springs) can be hazardous. If you’re unsure, it’s always safer to hire a professional to handle the installation.
Deck Addition
Adding a deck to a home can provide a wonderful outdoor space for relaxation, entertainment, and increase the overall value of the property.

Here’s a description of each step involved in a deck addition:
- Planning and Design: Determine the size, shape, and location of the deck. Consider features like railings, stairs, built-in seating, and access points to the home.
- Obtaining Permits: Check local building codes and secure any necessary permits. This ensures your deck is compliant with local regulations.
- Site Preparation: Clear the designated area of any debris, plants, or obstacles. This might also involve leveling the ground or marking out the exact boundaries for the deck.
- Foundation and Footings: Depending on the design, dig holes for footings and set them below the frost line for stability. Fill with concrete and let it set. This provides a sturdy base for the deck posts.
- Frame Construction: Install ledger boards against the house, and then set up the outer rim joists. Connect with internal joists using hangers, ensuring a stable frame for the decking.
- Decking Installation: Starting from the house outward, lay down the chosen decking material (e.g., wood planks, composite boards) and secure them to the joists. Space boards appropriately for expansion and drainage.
- Railing Installation: If the deck is above a certain height off the ground, railings will likely be required. Install posts, top rails, bottom rails, and balusters or spindles.
- Building Stairs: If the deck is raised and requires access from the ground, construct the stairs. This involves creating a sturdy frame, then adding treads and risers.
- Additional Features: Depending on the design, you might add built-in benches, planters, pergolas, privacy screens, or other features to enhance the deck’s functionality and appearance.
- Finishing: Depending on the material, this might involve sealing, staining, or painting the deck to protect it from the elements and improve its longevity.
When considering a deck addition, always factor in maintenance needs, especially if you opt for natural wood which may require regular staining or sealing. Whether you’re DIY-ing or hiring a professional, always ensure that the design and build conform to local building codes and regulations.
Entry Door Replacement
Replacing an entry door can enhance a home’s curb appeal, improve security, and increase energy efficiency.

Here’s a description of each step involved in an entry door replacement:
- Assessment and Measurement: Measure the existing door and frame to determine the correct size for the replacement. Consider both the door itself and the surrounding frame.
- Door Selection: Choose a new door based on materials (e.g., wood, steel, fiberglass), style, insulation properties, security features, and budget. You may also need to consider hardware and any decorative elements, such as windows or sidelights.
- Removal of Old Door: Carefully remove the existing door from its hinges. Depending on the replacement plan, you might also need to remove the door frame, threshold, and trim.
- Preparing the Opening: Clean and inspect the doorway for damage. Depending on the new door’s requirements, you might need to adjust or replace the sill, adjust the opening size, or repair any damaged areas.
- Test Fit the New Door: Before final installation, place the new door in the opening to ensure it fits correctly. Make any necessary adjustments.
- Install the Door: Secure the new door in place, ensuring it is plumb and level. This might involve shimming the door to get the perfect fit. If the door is pre-hung (it comes with its frame), the process will involve securing the entire unit in place.
- Weatherproofing: Add weatherstripping around the door to ensure a tight seal, preventing drafts and increasing energy efficiency.
- Install Hardware: Attach and align the door handle, lockset, and any other hardware like a peephole or security chain. Ensure all components work smoothly together.
- Finishing Touches: Depending on the door material and preference, you might paint or stain the door to protect it and enhance its appearance. Also, replace or add new trim or molding around the door.
While many homeowners might tackle an entry door replacement as a DIY project, it’s essential to ensure that the door is correctly aligned and seals properly. If you’re unsure about the process, consider hiring a professional to ensure a smooth and secure installation.
Factors Influencing ROI in Home Improvement
Home improvement projects can yield varying returns on investment (ROI) based on multiple influencing factors. Recognizing these can guide homeowners towards smarter renovation decisions, ensuring they reap optimal benefits when selling their properties.

The following table breaks down the key factors affecting ROI from home renovations and provides a brief explanation for each:
| Factor | Explanation |
|---|---|
| Location | The region or neighborhood can determine ROI. Areas with higher resale values can make some renovations more profitable. |
| Real Estate Market | A competitive market might result in higher ROIs as buyers value upgrades, whereas a slower market demands standout features. |
| Resale Value | Some renovations might not increase the resale value to cover their costs. It’s crucial to weigh cost against potential return. |
| Real Estate Agents | Consulting with agents provides insights on local market trends and high-ROI renovations, guiding better investment decisions. |
| Equity | When using home equity to fund renovations, it’s essential not to over-improve and risk not recouping the costs upon selling. |
| Potential Buyers | Projects that resonate with a broad audience, like minor bathroom remodels, can offer higher ROIs by appealing to more buyers. |
Budget Considerations in Home Improvement
Optimizing home improvement ventures requires a delicate balance between budget considerations and potential returns. While some high-cost projects might not guarantee significant ROI, careful planning and budgeting can ensure the best bang for your buck.

This table outlines the crucial budget considerations for selecting home improvement projects.
| Consideration | Explanation |
|---|---|
| Evaluate Project Budget | Define your spending limit for each renovation based on financial health and home improvement priorities. |
| Research Cost vs. Value | Opt for renovations that enhance aesthetics and ensure a higher resale value. E.g., garage door replacements often recoup 93.3% of their cost. |
| Focus on Low-Cost Projects | Many sub-$5,000 projects yield significant returns. Instead of grand renovations, aim for smaller, impactful enhancements. |
| Monitor Remodel Costs | During execution, actively track expenses to prevent budget overruns. Constant oversight ensures financial discipline throughout the renovation process. |
Impact of Design and Material Choices
- Countertops: Granite and quartz offer durability and aesthetics, yielding a better ROI than laminate. Consider cost, durability, and appearance.
- Flooring Materials: Hardwood floors can offer good ROI due to their appeal. Laminate or vinyl is cost-effective with decent aesthetics. Balance cost, durability, and style in your decision.
- Outdoor Spaces: A well-designed patio or deck enhances livability and appeal. Proper landscaping boosts curb appeal, and low-maintenance choices add value.

Effect on Property Aesthetics
- Increasing Curb Appeal: Repainting the exterior, updating doors, refreshing house numbers, and new outdoor lighting fixtures can enhance appeal affordably.
- New Deck and Porch Addition: Adds to outdoor living spaces. Choose durable, cost-effective materials that match your home’s style for maximum ROI.
- Landscaping: Well-maintained lawns, pruned trees, flowerbeds, and features like walkways enhance curb appeal. Use native and low-maintenance plants for added value.
Renovating vs New Addition
In home improvement, renovating often provides better ROI than new additions.
For instance, a kitchen refresh typically outperforms a complete redesign in returns. While adding a new bathroom can boost appeal and functionality, it’s vital to prioritize wisely. Smaller investments, like exterior improvements or window replacements, can offer substantial returns and improve energy efficiency.
In essence, balance your wishes, budget, and potential ROI when deciding on renovations or additions. Careful planning can enhance your home’s value without huge expenses. Next, we’ll delve into top ROI-generating home improvement projects.
Let Us Know How We’re Doing!
Did this expertly prepared resource answer your question?
Do you have another question about home maintenance, home improvement projects, home appliance repair, or something else?
Get more information, send in questions and keep the discussion going by contacting the I’ll Just Fix It Myself company customer service team at at 1-800-928-1490 or Email us at [email protected]