Rheem Thermostat Not Cooling? 9 Quick & Easy Things To Try First!
Experiencing issues with your Rheem thermostat not cooling or working at all can be frustrating, especially during those hot summer days or cold winter nights. In this article, we will delve into the common problems that may cause your thermostat to malfunction and provide guidance on what you can do to fix it.
When your Rheem thermostat is active and set to cool, but your AC isn’t blowing cold, first wait it out for about five minutes to give the unit time to cycle and switch the cooling back on. If waiting doesn’t work, reset the Rheem thermostat, replace the batteries, inspect the AC filters, check the furnace door switch, and inspect your AC coils.
As you navigate this article, you will encounter helpful information on Rheem thermostat troubleshooting, guided step-by-step instructions on how to resolve your thermostat’s cooling or functioning issues, and practical tips on maintaining your thermostat for longevity. Remember, your comfort is our priority, and we’re here to support you every step of the way.
History of Rheem Thermostats – Reliability and Features
Rheem is primarily known for its water heaters, heating, and cooling systems (like furnaces and air conditioners). They do produce thermostats to complement their HVAC systems, but they’re not necessarily known for their thermostats in the way that companies like Nest, Ecobee, or Honeywell are.
In the market for smart and programmable thermostats, brands like Nest (by Google) and Ecobee are more prominently recognized because their primary focus is on thermostat technology and associated smart home integration. In contrast, Rheem’s primary focus has been on manufacturing reliable heating and cooling systems.
However, if someone has a Rheem HVAC system, they might opt for a Rheem thermostat for compatibility and consistency.
Different Rheem Thermostat Models
There are several Rheem thermostat models available to cater to your specific needs. Let’s take a look at some options:
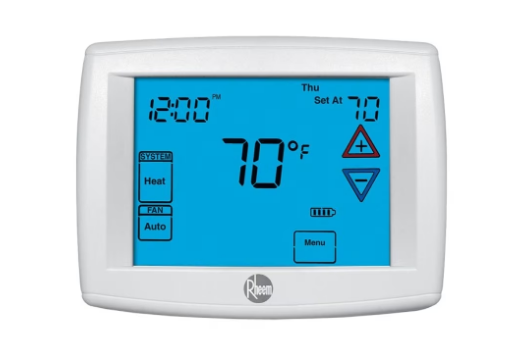
- Conventional Thermostats: Rheem offers basic non-programmable thermostats that come with essential features, such as easy-to-read displays and manual temperature adjustments. These simple thermostats provide consistent temperature control, ensuring a comfortable environment in your home.
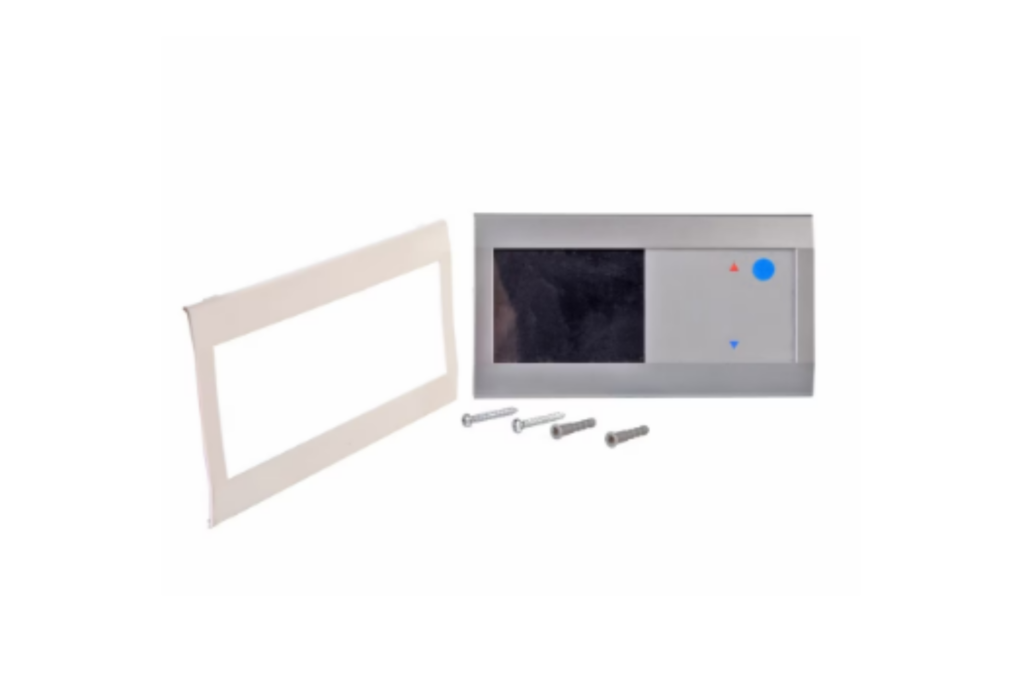
- High-Definition Thermostats: With these thermostats, you can create a customized schedule to suit your daily routines. You can set different temperature preferences for weekdays and weekends, allowing you to save energy when you’re not at home.
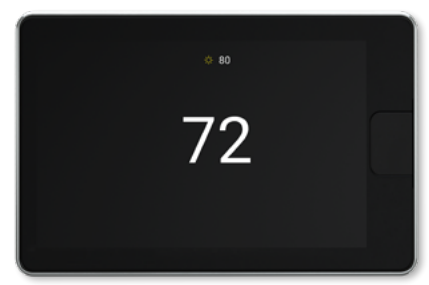
- EcoNet Smart Thermostats: Smart thermostats take comfort and convenience to a new level. They can be controlled remotely using your smartphone or other devices, enabling you to adjust thermostat settings no matter where you are. They also learn your habits and preferences, automatically adjusting the temperature to maintain optimal comfort and efficiency.
While most thermostats are fundamentally the same in terms of their function, each type will work a little differently and have slightly different settings and features.
Rheem thermostat not cooling (or working at all)
If that’s the case, follow these three steps FIRST!
- Check the circuit breakers
- Check the power source
- Be patient
- Check your Rheem thermostat settings
- Reset your Rheem thermostat
- Change your Rheem thermostat’s batteries
- Clean the air filters
- Assess the ductwork system
- Fix any airflow issues
Check the circuit breakers
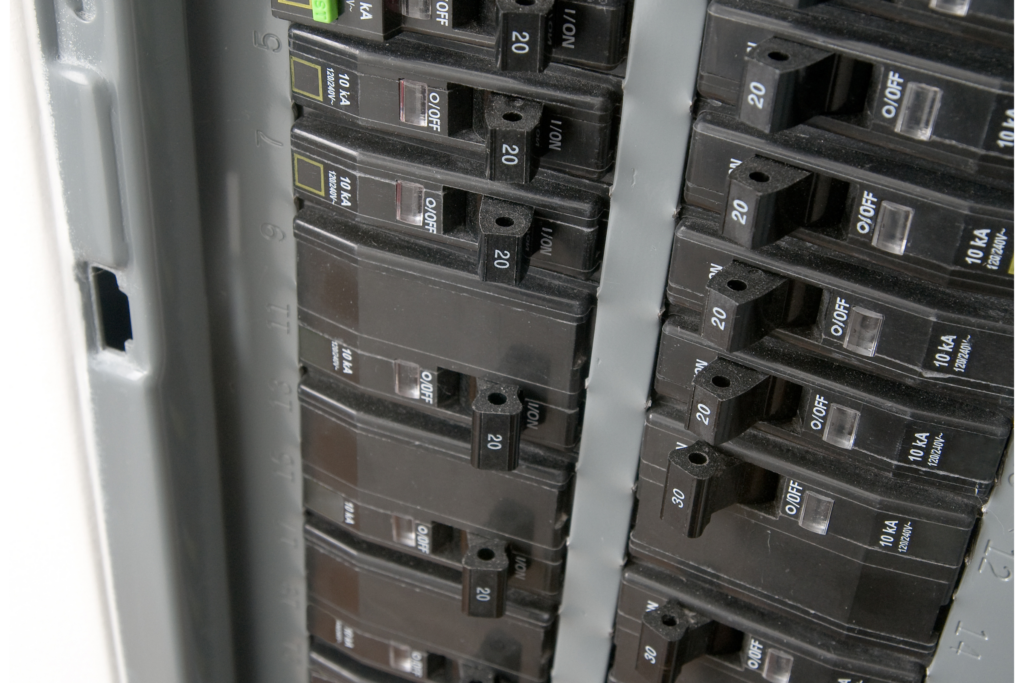
Sometimes, a thermostat may not be functioning due to a tripped circuit breaker. Locate your electrical box and look for the circuit breaker associated with your thermostat. If you find that the breaker has tripped, reset it by turning it off and then back on again. Make sure to give your thermostat a few minutes to power back on and for the air conditioner to start up.
Keep in mind that if a circuit breaker frequently trips, there may be an issue with the electrical system or the HVAC system itself. In such cases, it’s important to consult with a professional to diagnose and resolve the problem safely.
Check the Power Source
If you haven’t already, ensure that the thermostat is receiving power. If your thermostat has a display, see if it’s turned on. In case it’s not, check if there’s power running to the device. If you’re unsure whether the device is battery-operated or hardwired, refer to the user manual for guidance.
For hardwired thermostats, make sure the wiring is securely connected and in good condition. For battery-operated thermostats, we’ll probably end up changing the batteries anyway so it is good to know.
Be Patient
Check your Rheem thermostat settings
Reset your Rheem thermostat
How to reset a Rheem conventional thermostat
To reset a Rheem conventional thermostat, you’ll typically follow these steps. However, keep in mind that exact procedures might vary depending on the specific model of the thermostat:
- Locate the Reset Button: Many Rheem thermostats have a small reset button. This might be on the front face, side, or back of the thermostat. If it’s not readily visible, you might need to remove the thermostat cover.
- Press the Reset Button: Use a thin object like a paperclip or pin to press and hold the reset button for a few seconds.
- Reprogram the Thermostat: After resetting, you may need to reprogram your thermostat settings, such as the date, time, and desired temperature settings.
- Power Cycle (Optional): If you don’t find a reset button, or if pressing it doesn’t seem to do the job:
- Turn off the power to your HVAC system from the circuit breaker.
- Remove the thermostat cover.
- Take out the batteries (if your thermostat has batteries).
- Wait for about a minute.
- Reinstall the batteries and put the thermostat cover back on.
- Turn the power back on at the circuit breaker.
How to reset a Rheem high-definition thermostat
If you need to reset one of these models, here’s a general guideline. However, always consult the user manual specific to your thermostat model for precise instructions:
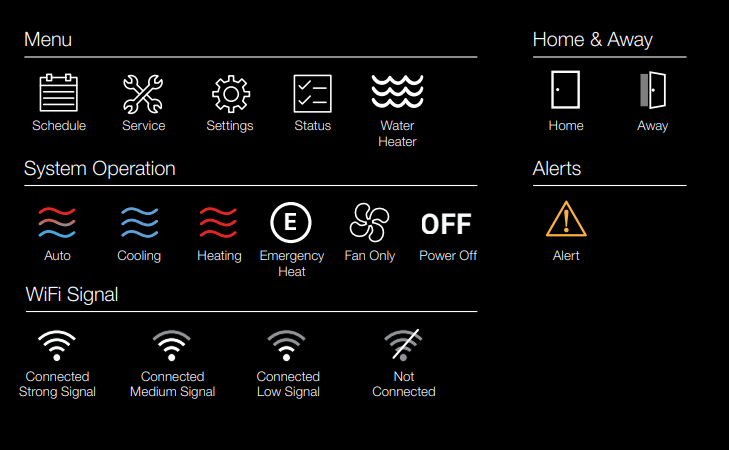
- Access the Main Menu: On the touchscreen display, go to the main menu. This can usually be accessed by pressing a ‘Menu’ button or an icon resembling three horizontal lines.
- Look for ‘Settings’ or ‘System’ Option: Once in the main menu, look for an option labeled ‘Settings’, ‘System’, or something similar.
- Find ‘Reset’ Option: Within ‘Settings’ or ‘System’, search for an option that mentions ‘Reset’. There might be multiple reset options available, such as:
- Factory Reset: This will revert all settings back to their original defaults.
- Wi-Fi Reset: This will reset only the Wi-Fi settings, useful if you’re having connection issues or changed your network.
- Schedule Reset: This will clear any programmed schedules.
- Select the Desired Reset Option: Tap on the desired reset type and confirm if prompted.
- Power Cycle (Optional): If you’re experiencing persistent issues or if the system isn’t responding, try a power cycle.
- Turn off the power to your HVAC system from the circuit breaker.
- Wait for a minute or two.
- Turn the power back on at the circuit breaker.
How to reset a Rheem EcoNet thermostat
The Rheem EcoNet thermostat is designed for smart control of HVAC and water heating systems. If you need to reset your Rheem EcoNet thermostat, here are some general steps to guide you. However, always make sure to consult your specific model’s user manual for precise instructions:
- Access the Main Menu:
- On the EcoNet thermostat’s touchscreen, go to the main menu. This might be represented by an icon or a ‘Menu’ label.
- Navigate to ‘Settings’:
- Within the main menu, find and tap on the ‘Settings’ option or something similar.
- Go to ‘System’ or ‘Advanced Settings’:
- Some models might have a ‘System’ or ‘Advanced Settings’ option within the ‘Settings’ menu. If yours does, tap on it.
- Find the ‘Reset’ Option:
- Scroll through the options until you find something that mentions ‘Reset’.
- There could be various reset options available, such as:
- Factory Reset: This will revert all the settings of the thermostat back to the factory defaults. Any customized settings, schedules, or preferences you’ve entered will be lost.
- Wi-Fi Reset: This option is for resetting just the Wi-Fi settings.
- Schedule Reset: This will clear any scheduled settings.
- Choose the Desired Reset Option:
- Tap on the reset option you wish to apply and follow any on-screen instructions or prompts to confirm the reset.
- Power Cycle (Optional):
- If your EcoNet thermostat is not behaving correctly even after a reset, you might consider a power cycle:
- Switch off the power to your HVAC system from the main circuit breaker.
- Wait a couple of minutes.
- Restore power to the system.
- If your EcoNet thermostat is not behaving correctly even after a reset, you might consider a power cycle:
Change your Rheem thermostat’s batteries
A common reason for a Rheem thermostat not working properly is due to low or dead batteries. To fix this, replace the batteries in your thermostat.
Changing batteries in a thermostat is typically straightforward, but the process might differ slightly based on the model of the Rheem thermostat you have. Here are general steps to change the batteries in a typical thermostat:
- Turn Off the HVAC System:
- It’s a good practice to turn off the power to your HVAC system before working on your thermostat to ensure safety.
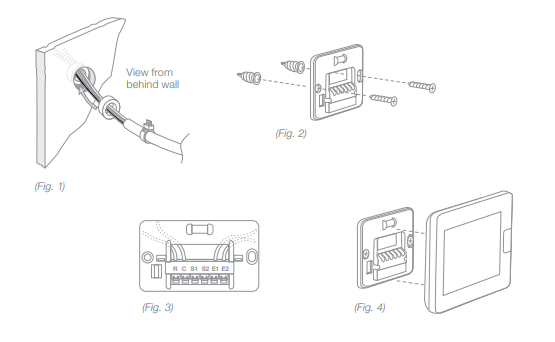
- Remove the Thermostat Cover:
- Most thermostats have a detachable cover or faceplate. This can be removed by gently prying it off from the bottom, sides, or as per the design of your specific thermostat.
- Some thermostats might have screws holding the faceplate in place, which would need to be unscrewed.
- Locate the Battery Compartment:
- Once the cover is off, you should see the batteries or the battery compartment.
- Note: Not all thermostats use batteries. Some might be hard-wired and have a backup battery.
- Replace the Batteries:
- Remove the old batteries.
- Make sure to note the polarity (+ and -) directions when inserting the new batteries.
- Use the recommended battery type (e.g., AA, AAA, coin-cell, etc.) for your specific thermostat model.
- Reattach the Cover:
- Once the batteries are replaced, reattach the thermostat cover or faceplate. If there were screws, make sure to screw them back in place.
- Turn On the HVAC System:
- Restore power to your HVAC system.
- Check the Thermostat:
- Ensure the thermostat powers up and displays correctly.
- It might be a good idea to check and adjust the settings if needed, as some thermostats might revert to default settings after a battery change.
Clean the air filters
Your air conditioner’s performance largely depends on the airflow through the system. A crucial component in maintaining proper airflow is the air filter. Clean air filters are vital for your Rheem thermostat to function efficiently. They allow smooth airflow, which prevents your air conditioning from overworking and maintains cooling efficiency.
Over time, air filters accumulate dust, pollen, and other debris. A clogged air filter can reduce airflow, negatively affecting your thermostat’s performance and potentially causing your air conditioner to not cool or work at all.
To ensure optimal system performance, check and replace air filters regularly, typically every 1-3 months.
Assess the ductwork system
Another critical aspect of your air conditioning system is the ductwork. Properly sealed and insulated ducts ensure efficient air distribution and prevent energy loss. Leaky ducts can lead to inefficient cooling and uneven temperatures in your home. T
o ensure your Rheem thermostat functions effectively, inspect your ductwork for any gaps or cracks. Seal any leaks with duct mastic and insulate exposed ducts to improve energy efficiency and overall performance.
If you’re unsure about the condition of your ductwork, consider consulting an HVAC professional for an assessment.
Fix airflow issues
If you’ve checked your air filters and ductwork but still experience issues with your Rheem thermostat not cooling or working properly, there could be other airflow problems within your system. Here’s a step-by-step guide to addressing some common airflow issues:
- Inspect the condenser unit: Ensure there’s no debris around your outdoor condenser unit. Clean any dirt, leaves, or branches to maintain proper airflow.
- Examine the condenser coils: Dirty condenser coils can drastically reduce cooling efficiency. Clean the coils by gently spraying them with a hose to remove dirt and debris.
- Check the fan motor: If your air conditioner’s fan isn’t working, it could be due to a faulty fan motor or capacitor. Consult an HVAC professional to inspect and replace these components if necessary.
By addressing these airflow issues, you can help ensure your Rheem thermostat functions optimally, keeping your home cool and comfortable.
Importance of Regular Maintenance on a Rheem AC unit
Advantages of Regular HVAC Maintenance
Taking care of your Rheem thermostat and HVAC system is essential for maintaining its efficiency and prolonging its lifespan. With regular maintenance, you can:
- Improve energy efficiency: A clean and well-maintained system uses less energy, helping you save on energy bills.
- Prevent costly repairs: Identifying small issues before they become significant problems can save you money on expensive repairs.
- Extend equipment life: Regularly cleaning and inspecting your system can help keep it running smoothly for longer.
- Improve indoor air quality: Cleaning the filters and checking your system ensures clean and healthy air in your home.
To maintain your Rheem thermostat and HVAC system, follow these steps:
- Check and replace the air filter regularly, preferably every 30 to 60 days.
- Inspect the outdoor unit for debris, such as leaves, and keep it clean.
- Keep the area around the indoor unit free from dust and clutter.
- Regularly clean the ducts, vents, and grilles for proper air circulation.
- Schedule an annual inspection by a Rheem Pro Partner or other HVAC professional.
When to Call a Professional
While it’s essential to perform regular maintenance, there are times when you should call an HVAC technician for help. Here are some signs that you might need professional assistance:
- Thermostat not working at all: If your Rheem thermostat is not cooling or functioning despite your best efforts, it may require professional help to diagnose and repair the issue.
- Persistent problems: If you’re consistently experiencing issues with your thermostat and HVAC system, such as poor performance or strange noises, a professional may be needed to address the underlying problems.
- System installation or major repairs: For the installation of a new HVAC system or significant repairs, it’s best to have a Rheem Pro Partner or other HVAC professional handle the job.
In these situations, don’t hesitate to reach out to a professional, as they have the expertise and tools required to diagnose and resolve your Rheem thermostat or HVAC issues correctly. Regular maintenance, combined with the assistance of an HVAC technician when needed, ensures the smooth and efficient functioning of your system.
Other Common Rheem Thermostat Issues
Loose or Corroded Wiring
Loose or corroded wiring can lead to your Rheem thermostat not working correctly. Ensure all connections are tight and check for any signs of corrosion. If you spot any issues, you may need to replace the wiring to ensure proper functioning.
Battery Problems
Your thermostat might not be working if it runs on batteries and the batteries need replacing. If changing the batteries doesn’t help, consider checking all connections to ensure proper functioning.
Dirty Thermostat and Components
Dust and dirt can cause your Rheem thermostat to malfunction. Regularly cleaning the thermostat and system components such as condenser coils, evaporator coils, and sensors can help prevent these issues.
Blocked or Leaky Ductwork
Blockages or leaks in your ductwork can affect your Rheem thermostat’s performance. Check your ducts for any potential issues and promptly address any blockages or leaks you find.
Refrigerant Leaks
A refrigerant leak can cause your thermostat not to cool (or work at all). Having a professional inspect your system for any signs of refrigerant leaks is essential to ensure proper functioning.
Faulty Compressor, Capacitor, or Condenser
Your Rheem thermostat might not be working if you have a faulty compressor, capacitor, or condenser. If you suspect any of these components to be the issue, consult with a professional to diagnose and resolve the problem promptly.
Continuity Problems
Your Rheem thermostat may not work correctly if there’s an issue with continuity between system components. Check for any connectivity issues and address them to ensure proper functioning of your thermostat.
Let Us Know How We’re Doing!
Did this expertly prepared resource answer your question?
Do you have another question about home maintenance, home improvement projects, home appliance repair, or something else?
Get more information, send in questions and keep the discussion going by contacting the I’ll Just Fix It Myself company customer service team at at 1-800-928-1490 or Email us at [email protected]