Cleaning Your Microwave: Daily Maintenance and Thorough Deep-Clean Guide
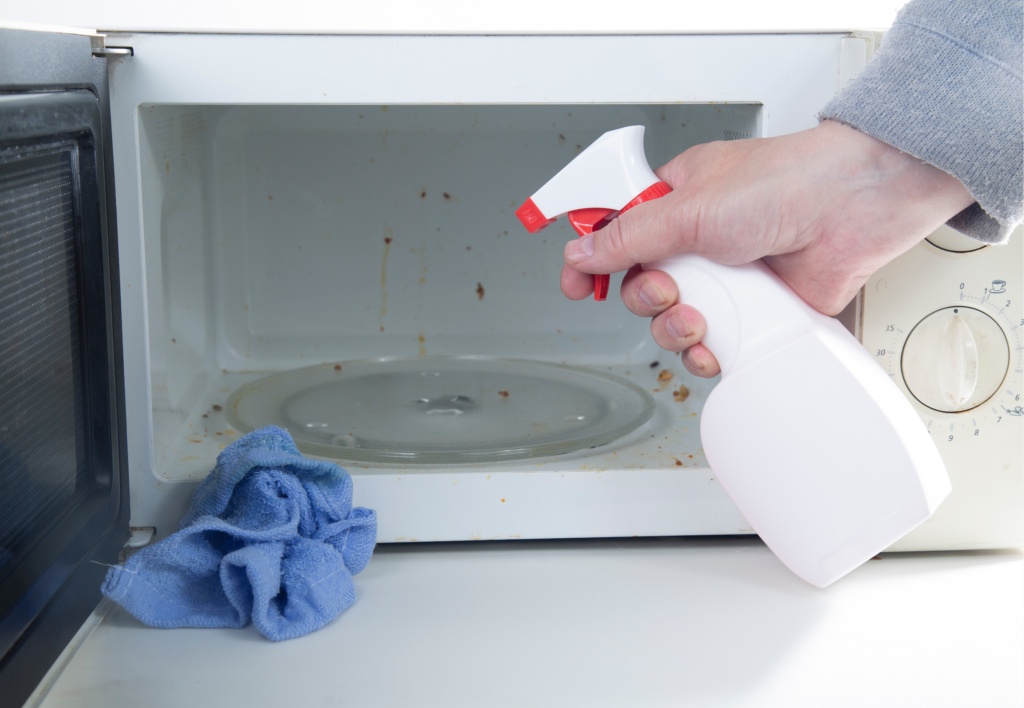
Maintaining a clean microwave is essential for both hygiene and performance. We all know how spills and splatters can quickly become a stubborn mess if left unattended. To keep your microwave in top condition, a routine of daily wipes and periodic deep cleans is recommended. Daily cleaning involves a simple wipe-down with a damp cloth to remove any fresh spills, ensuring the interior is free from food particles and odors.
For a more thorough deep clean, which should be conducted every few weeks depending on usage, we deploy the power of steam to loosen up grime. Heating a bowl of water mixed with a natural cleaning agent like vinegar or lemon in the microwave creates steam that penetrates and softens the buildup. After the steam treatment, a soft sponge or microfiber cloth can easily wipe away the residue, leaving your microwave sparkling clean and odor-free.
Preparation and Safety Measures
Before we begin the cleaning process, it’s crucial to have all necessary supplies at hand and to ensure the safety of both ourselves and the appliance. Proper preparation prevents poor performance and increases the efficiency of the cleaning process.
Gather Cleaning Supplies
For a successful microwave cleaning, you’ll need the following:
- Microwave-safe bowl: Essential for heating cleaning solutions.
- Water: Acts as the base for homemade cleaning solutions.
- Vinegar: A natural descaler and deodorizer; mix with water for a potent cleaning solution.
- Baking soda: Useful for tackling tough stains when made into a paste.
- Dish soap: Good for cutting through grease on microwave surfaces and turntable.
- Paper towels or microfiber cloths: Handy for wiping down the interior and exterior.
- All-purpose cleaner: Optional for a final wipe-down or to address exterior surfaces.
Ensuring Electrical Safety
To clean your microwave safely:
- Unplug the microwave before any cleaning to prevent electrical shock or damage to the appliance.
- Test your microwave-safe bowl with water first to ensure it won’t overheat or crack when used with cleaning solutions.
Following these guidelines will ensure that our microwave is not only clean but also maintained without any risk to our safety.
Daily Microwave Cleaning
Maintaining a clean microwave requires daily attention to spills and splatters to prevent build-up. We can easily address daily grime with simple materials and quick methods to keep our microwave fresh and hygienic.
Wiping Spills and Splatters
As soon as spills occur, we should immediately wipe them up with a damp cloth or paper towels. For dried-on food, dampen a cloth with water and a bit of dish soap, place it over the stain, and heat for 20-30 seconds. This will loosen the residue, allowing us to easily wipe out the microwave. It’s important to clean the microwave turntable by removing it and washing it with dish soap — just as we would a regular dish.
Materials Needed
- Damp cloth
- Dish soap
- Paper towels
Procedure
- Wipe spills immediately with paper towels.
- For tougher stains, use a cloth dampened with dish soap.
- Heat for 20-30 seconds if necessary.
- Remove the turntable and wash separately.
Deodorizing with Lemon or Vinegar
To remove odors and refresh the microwave daily, we can harness the power of lemon or vinegar. Slice a lemon, place it in a bowl of water, and microwave on high for a few minutes until the interior is steamy. Alternatively, mix a couple of tablespoons of vinegar with a cup of water, microwave, and then allow the solution to sit with the door closed for additional deodorizing.
Materials Needed
- Lemon or vinegar
- Bowl of water
- Sponge
Procedure
- Add lemon slices or mix vinegar with water in the bowl.
- Microwave on high until steam forms.
- Leave the door closed for a few minutes after steaming.
- Wipe the interior with a sponge after the steam settles.
This steam cleaning approach not only tackles smells but also loosens grime, simplifying our daily cleaning routine.
Deep Cleaning the Microwave
When tackling a deep clean of your microwave, focus on removing baked-on stains and killing bacteria. We’ll cover the essentials of interior deep cleaning and addressing the turntable and door to ensure the entire microwave is spotlessly clean and hygienic.
Interior Deep Cleaning
The interior of a microwave can accumulate a lot of grease and grime over time. Here’s a step-by-step process to address this:
- Prepare the Cleaning Solution: Mix a solution of two cups of water and two tablespoons of vinegar. Pour this into a microwave-safe bowl.
- Heat the Solution: Place the bowl in the microwave and heat it until boiling—about five minutes—to help loosen the grime with steam.
- Wipe Down: After the solution has done its work, use a nonabrasive sponge to wipe the interior. For stubborn stains, dip the sponge in the vinegar and water solution before scrubbing.
- Rinse: Wipe the interior with a cloth dampened with plain water to remove any vinegar residue.
| Step | Material | Instruction |
|---|---|---|
| 1 | 2 cups water, 2 tbsp vinegar | Mix in a bowl |
| 2 | Microwave-safe bowl | Heat for 5 minutes |
| 3 | Nonabrasive sponge | Scrub the interior |
| 4 | Cloth, plain water | Remove vinegar residue |
Turntable and Door Cleaning
Next, let’s ensure the turntable and door get their due attention:
- Turntable: Remove the turntable and wash it in the sink with soapy water or in the dishwasher. Dry thoroughly before placing it back in the microwave.
- Seals and Door: Wipe down the door and the seals with a solution of vinegar and water to kill bacteria and remove fingerprints and smudges. Use a clean cloth to dry.
Remember, rinse all surfaces with plain water after using the vinegar solution to ensure no cleaning residue remains which could affect the flavor of your food.
Maintaining Your Microwave
To keep your microwave in top shape, we’ll go through regular upkeep and knowing when to call a professional. It’s about balancing frequent, simple cleans with recognizing issues only experts should handle.
Regular Upkeep
We recommend incorporating microwave maintenance into your routine cleaning to prevent buildup of grimes. Here’s a straightforward approach we suggest:
- Daily Surface Wipe: Every day, use a damp cloth to wipe the interior and exterior. This prevents grime from settling in.
- Weekly Deodorizing: Place a microwaveable bowl filled with a mixture of water and lemon juice or vinegar inside the microwave. Run it on high for five minutes to steam clean and remove odors.
- Frequency of Deep Cleaning: Depending on use, a deeper clean should be done at least once a month. Remove and wash the turntable with dish soap and hot water, and wipe the interior with a vinegar-water mixture.
Note: Always ensure the appliance is turned off and cool before cleaning to avoid risks.
When to Call a Professional
While regular maintenance is something we can do, there are times when we should step back and consider professional help.
- Damage to Internal Components: If you suspect issues with the microwave’s function that go beyond superficial cleanliness.
- Persistent Problems: If after cleaning, the microwave continues to emit smells, or the grime doesn’t come off, it could indicate deeper issues.
Professional Assessment: Contact a reputable cleaning service or a certified appliance maintenance expert, as they can properly diagnose and remedy problems without risking further damage to the microwave.
By incorporating these maintenance tips and recognizing when professional intervention is needed, we ensure our microwave’s longevity and performance.
Troubleshooting Common Issues
When it comes to maintaining a clean microwave, persistent odors and buildup can often be the most stubborn problems to tackle. We’ll guide you through the steps to handle these issues effectively.
Handling Persistent Odors
If you’re faced with a microwave that smells, despite regular cleaning, there’s a high chance that the odor has penetrated the microwave’s interior surfaces. To combat this, use lemon juice or white vinegar — natural deodorizers that break down odor-causing molecules.
- Burnt Popcorn: Place a bowl with half a cup of water and 1 tablespoon of lemon juice inside the microwave and heat it on high for 3 minutes. Let it stand with the door closed for 5 minutes before removing and wiping the interior.
- General Odors: Mix 2 tablespoons of white vinegar with a cup of water in a microwave-safe bowl. Heat the solution for around 5 minutes on high power. Allow the steam to condense on the microwave walls, then wipe down with a cloth.
Addressing Food Particles and Grease
Crumbs and grease can harden over time, making them more difficult to remove. Preventing grease and food splatter is best managed with regular use of a splatter cover. However, here’s how to address these issues once they occur:
- Crumbs: After heating a vinegar or lemon juice solution as mentioned above, take a damp cloth and carefully wipe the turntable and the interior walls to pick up loosened food particles.
- Grease: For greasier spots, use a solution of warm water and dish soap. Let the solution sit on the grease for a few minutes to break it down, then wipe clean with a microfiber cloth for a degreased finish. If necessary, repeat the process to ensure all grease is removed.
Let Us Know How We’re Doing!
Did this expertly prepared resource answer your question?
Do you have another question about home maintenance, home improvement projects, home appliance repair, or something else?
Get more information, send in questions and keep the discussion going by contacting the I’ll Just Fix It Myself company customer service team at at 1-800-928-1490 or Email us at [email protected]